Building a Talking Trivia Alarm Clock, Part 2: Streaming Dialogflow on a Raspberry Pi

Howdy and welcome back! In this post, we’ll (continue) building a talking alarm clock that wakes people up by nagging them to answer 3 trivia questions, first thing in the morning. It turns out that this seemingly, er, niche project forces us to learn a lot about what it takes to build a general voice assistant like, Google Home or Alexa.
In the first post, we built a Voice User Interface that, given a command like “Set my alarm for 8 AM,” set an alarm and spoke a response like, “Sure thing, I set your alarm for 8.”
To build that interface, our alarm clock had to be able to:
1. Recognize human speech (i.e. speech-to-text)
2. Interpret and understand user commands (i.e. intent matching)
3. Fulfill those commands (by, for example, scheduling an alarm)
4. Come up with a response
5. Play that response in a human-like voice (i.e. text-to-speech)
Luckily for us, most of that complexity was taken care of by Dialogflow, Google’s framework for building smart conversational agents (like chatbots).
In that last post, we left off having just finished building a Dialogflow agent that recognized the commands “Set an alarm,” “List my alarms,” and “Delete my alarm.” But we only tested that agent in the browser, in Dialogflow’s built-in test console. And although our agent recognized the command “Set my alarm for 8AM,” we didn’t write code to actually then go and set that alarm. So in this post, let’s do both those things.
Streaming Dialogflow Through the AIY Voice Kit (or any other local computer)
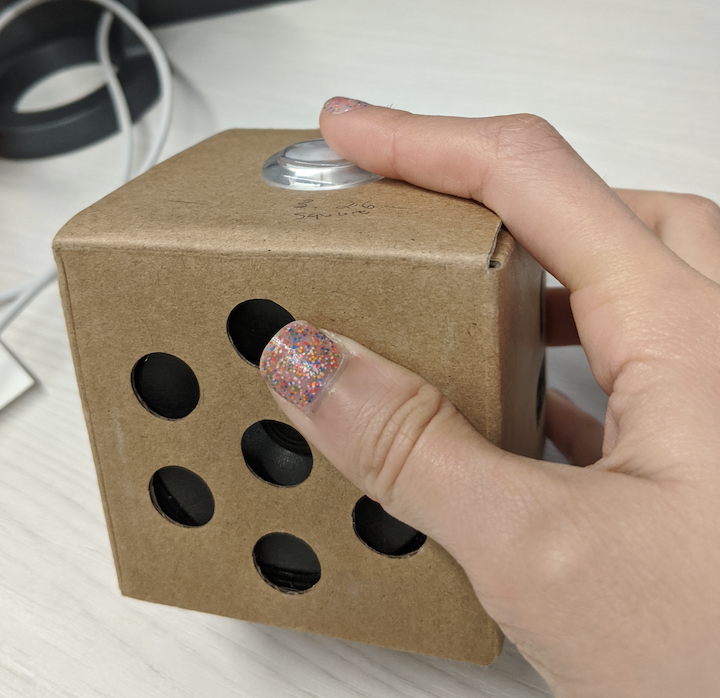
The AIY Voice Kit
First, let’s get our Dialogflow agent running on our Raspberry Pi (Raspi). For this project, I decided to use an AIY Voice Kit, a maker-minded kit from Google for building a “DIY Intelligent Speaker.” It comes with a Raspberry Pi Zero (which is a very small/lightweight type of Raspi), a pushbutton, a speaker, a “Voice Bonnet” (i.e. a board with a microphone that snaps on to the Raspi), a cardboard enclosure, and all of the wires and bits needed to put the thing together.
](/images/2020-02-25-building-a-talking-trivia-alarm-clock,-part-2:-streaming-dialogflow-on-a-raspberry-pi/1.jpg)
You don’t need to use an AIY kit to make this project. In fact, you can just use your laptop, which has a microphone and speaker built in (woohoo!). But I wanted to build an actual alarm clock, so the AIY kit helped me achieve a small form factor. The code we’ll talk about should work on any platform though, especially if it runs Linux.
If you’re using this kit, start off by assembling it and installing the latest AIY system image.
Cloning the Code
All the code you’ll need to run your trivia alarm clock is here in the Talking to Machines Github repo under trivia_alarm.
To download that code, on your device/Raspberry Pi:
git clone git@github.com:dalequark/talking_to_machines.git
(If you’re on a Raspberry Pi, you might have to sudo apt-get install git first!)
Next, run:
cd talking_to_machines/trivia_alarm
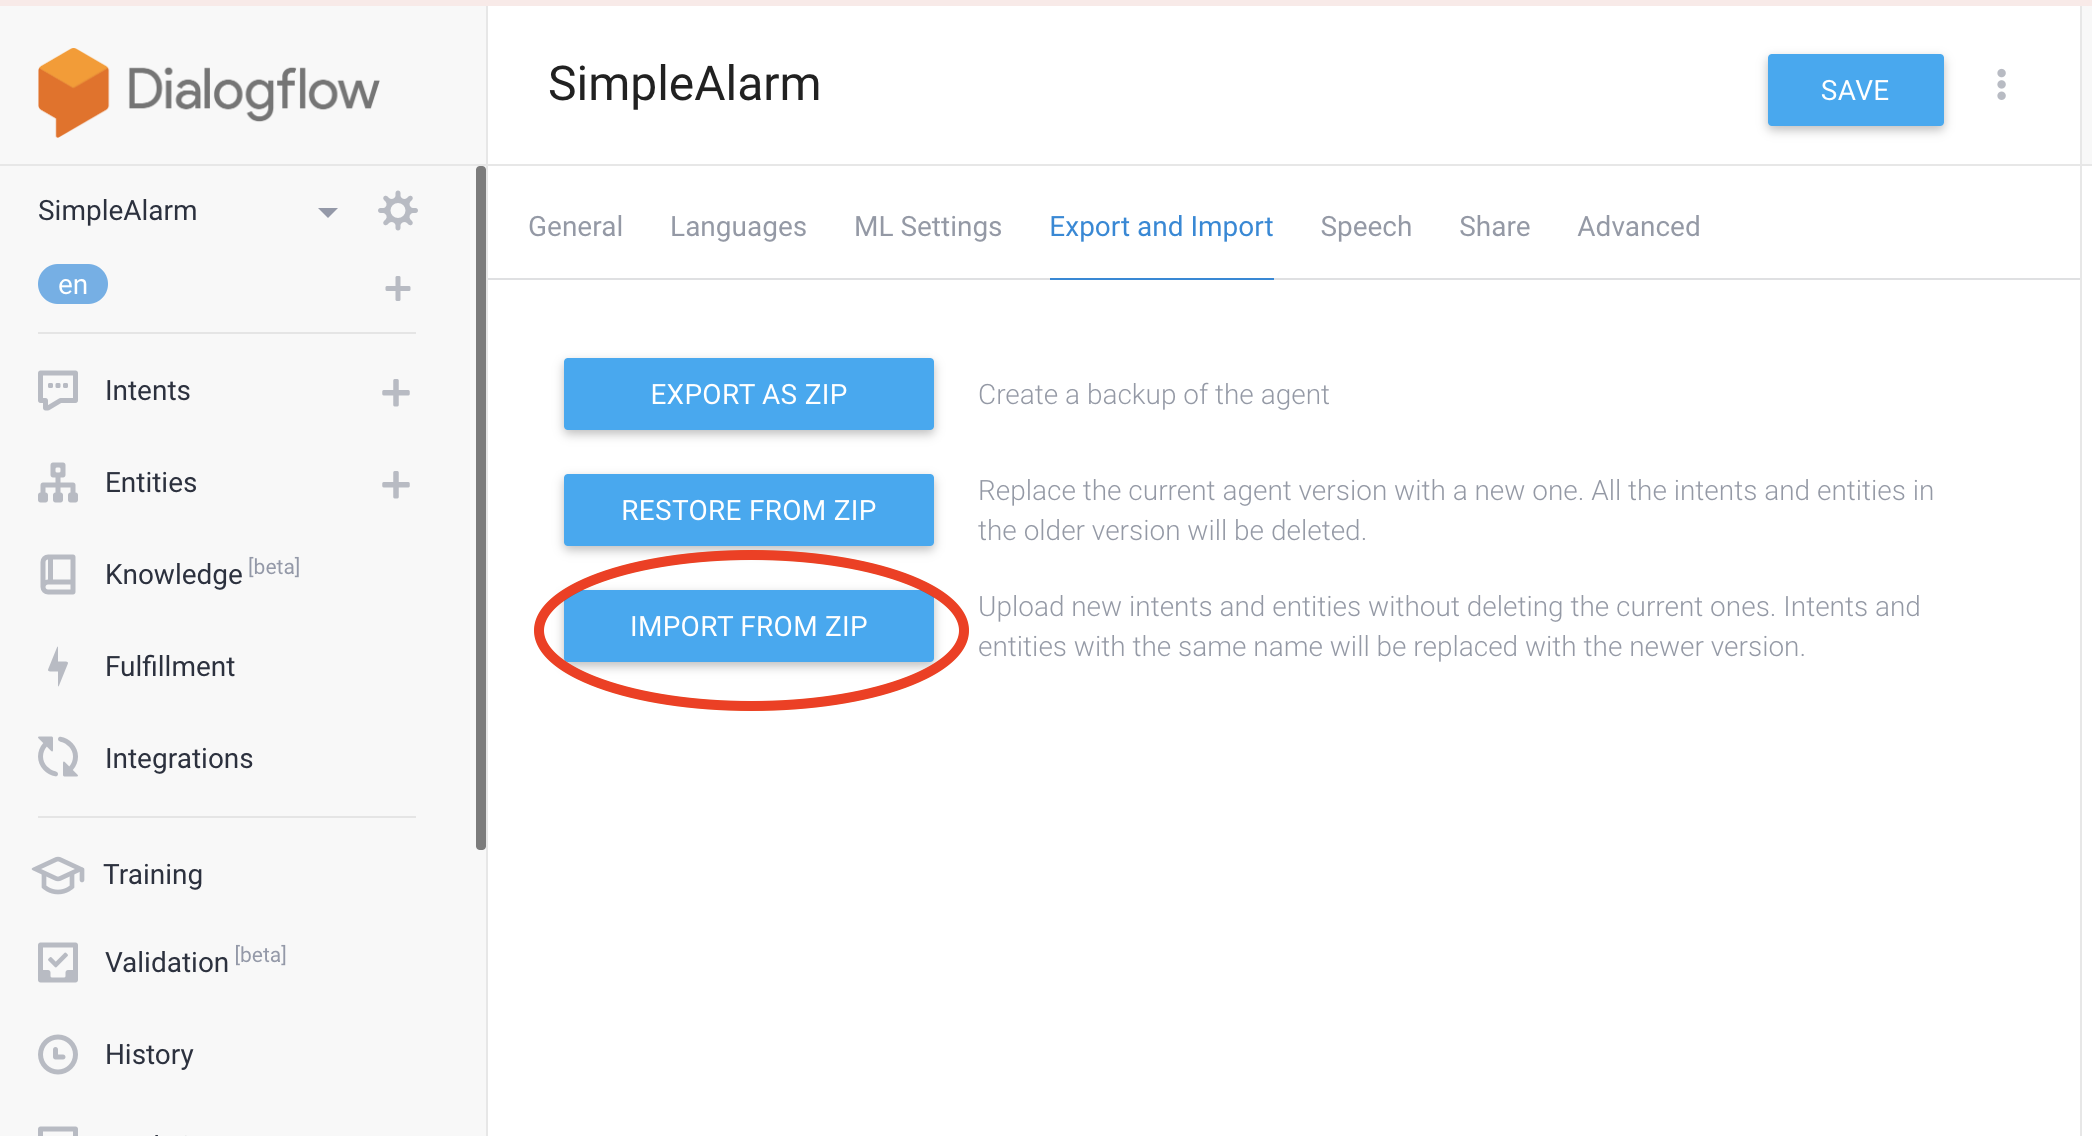
and take a look around. Notice SimpleAlarmAgent.zip, which is Dialogflow agent we built in the first post. If you followed along in that first post and built your own agent, you can ignore that file. Otherwise, you’ll need to go to the Dialogflow console and import this file:
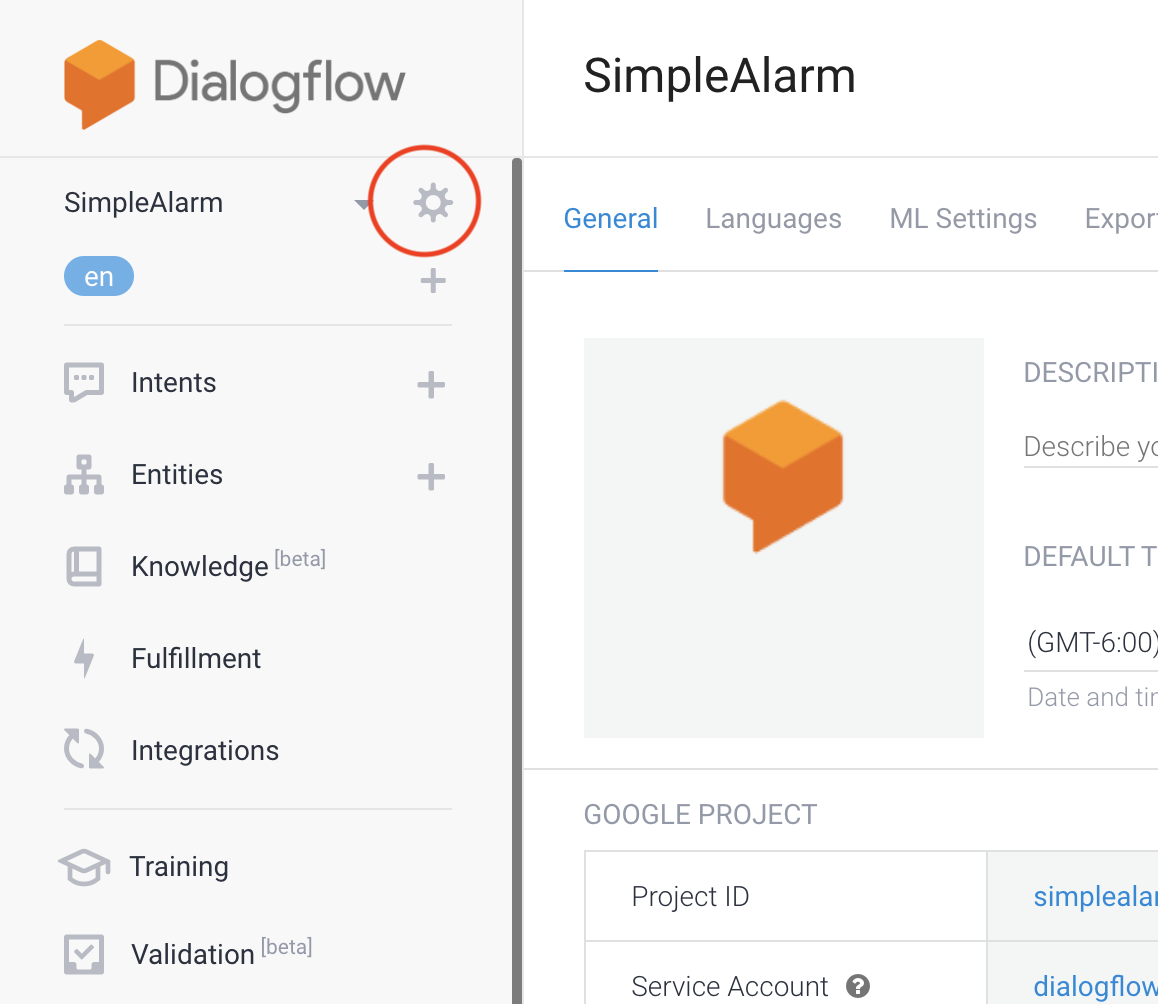
Next, you’ll need some pieces of information from the Dialogflow console, like the name of your project id.
Click on the gear icon next to your project’s name in the left-hand bar.
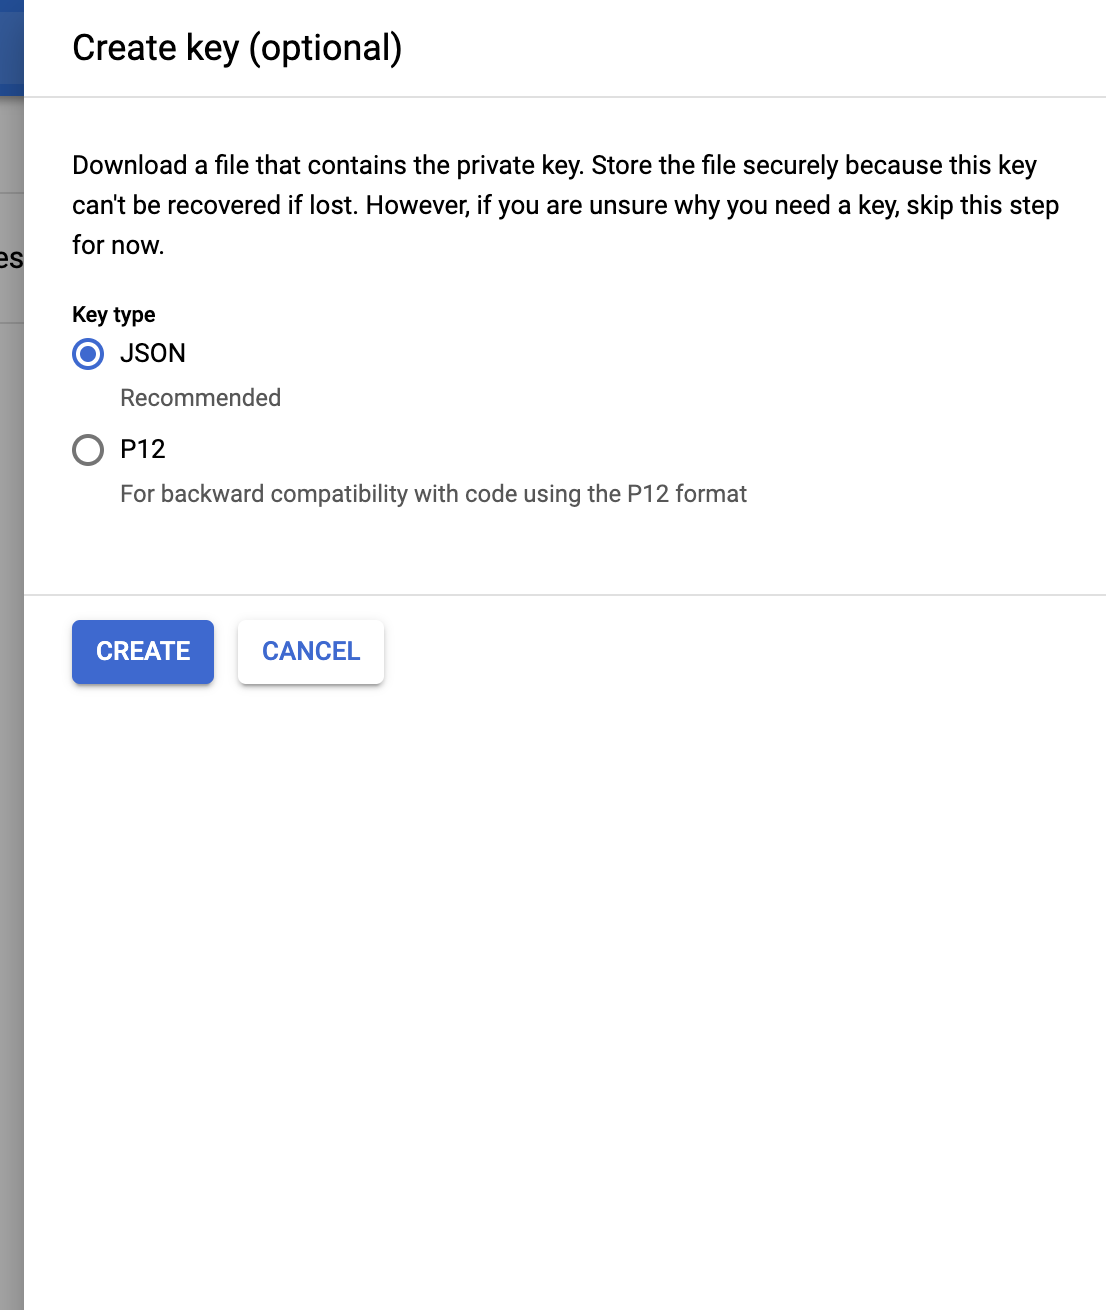
Setting Up Authentication
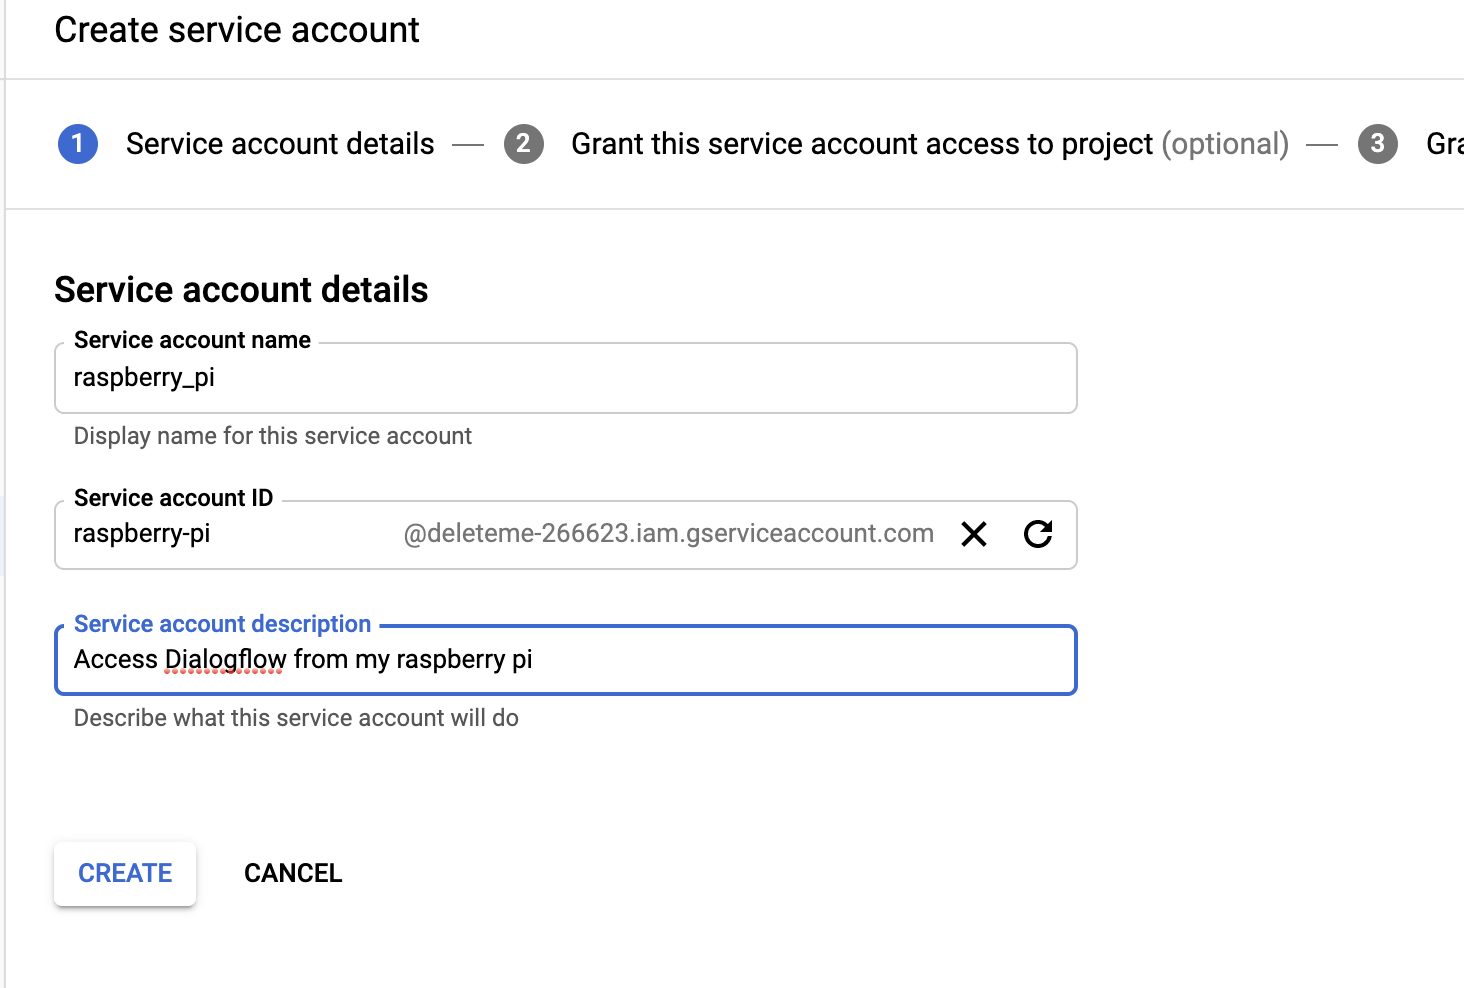
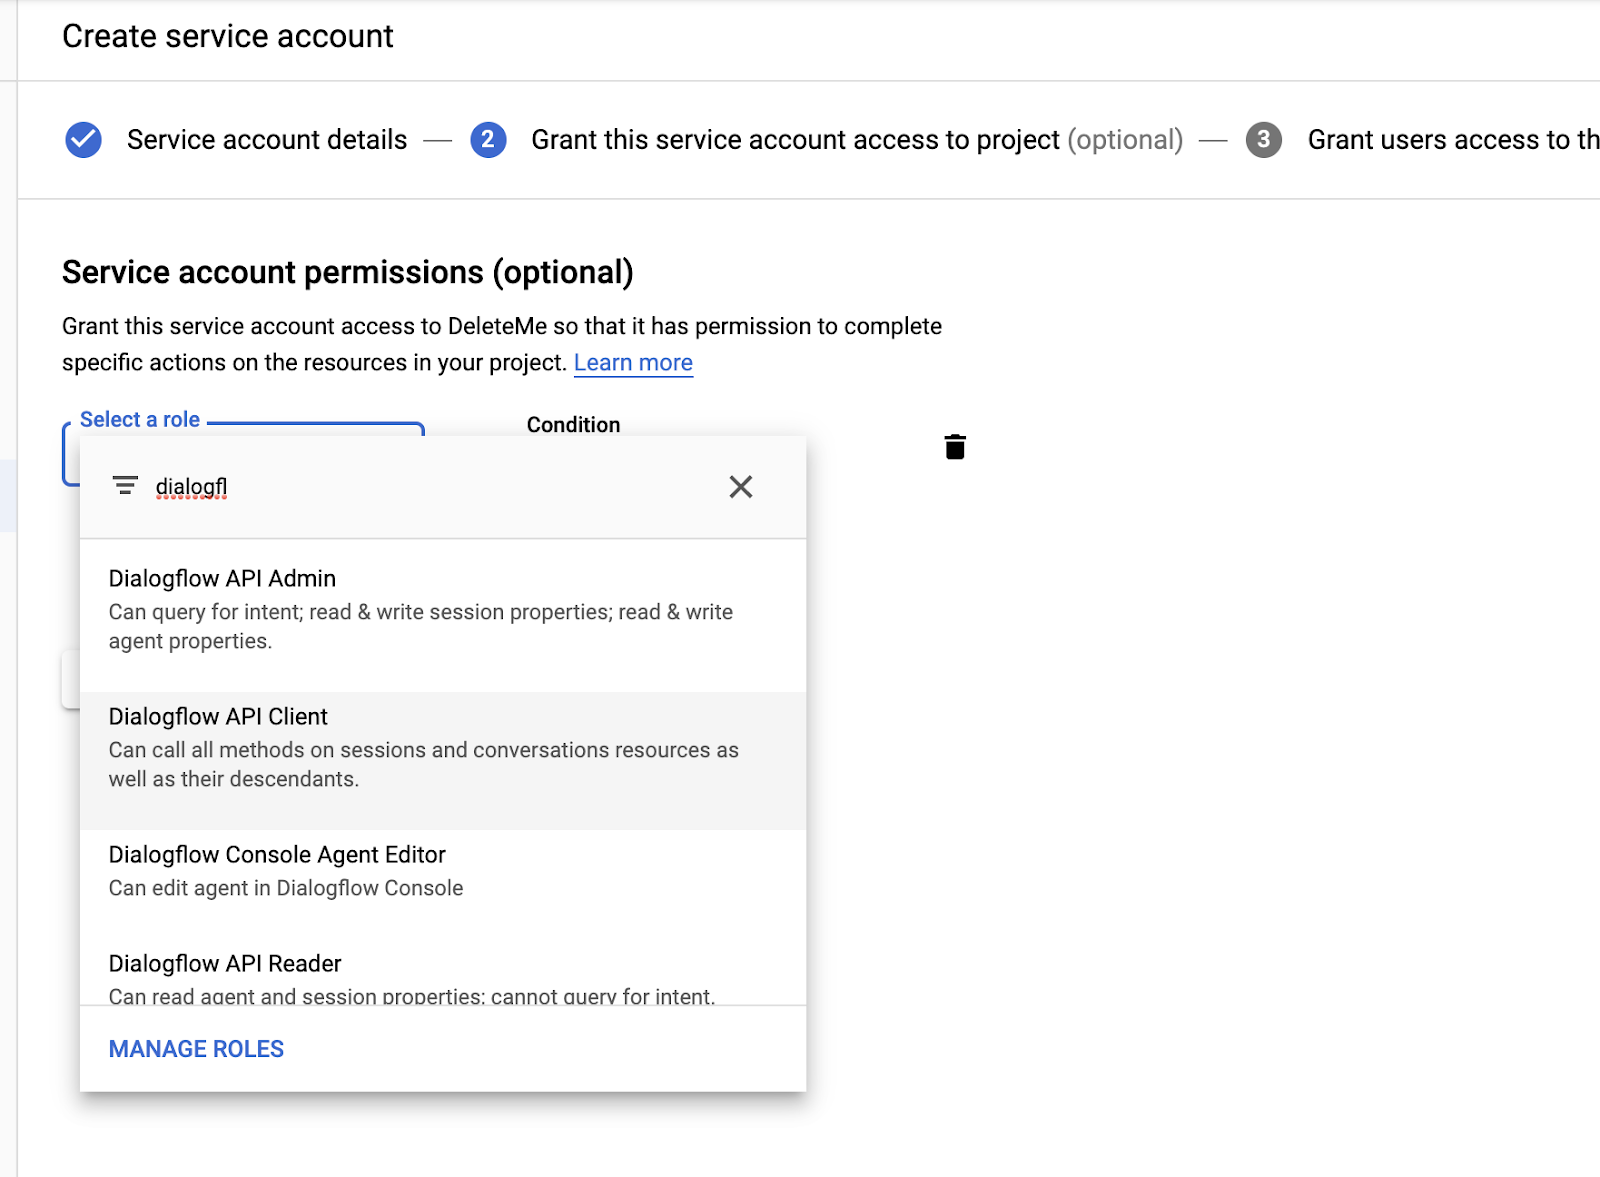
Since we want to interact with our Dialogflow Agent from our Raspberry Pi, we’ll need to set up authentication. Dialogflow is built on top of Google Cloud Platform, and across Google Cloud, authentication is handled through something called service accounts, which we’ll set up now.
Note: if you’re using a Raspberry Pi without access to a web browser (i.e. straight from the command line), you’ll probably want to do this next part on your laptop.
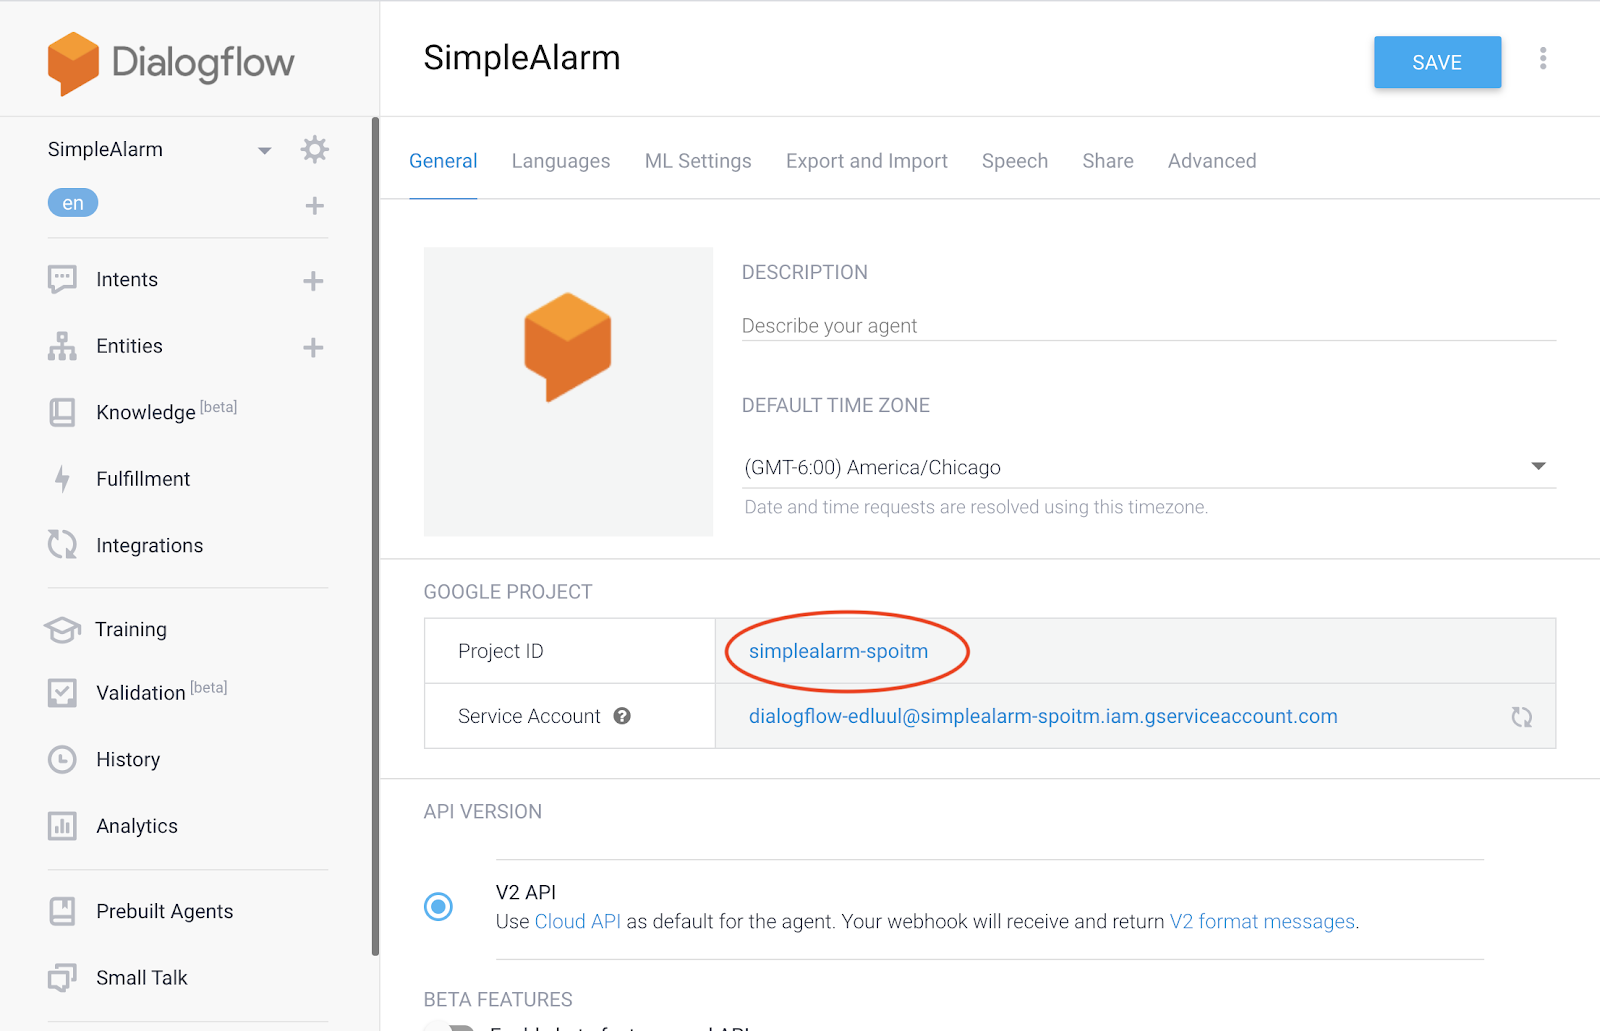
First, navigate to the GCP console (now’s a good time to mention you’ll need to have a Google Cloud account and login). Navigate to the GCP project whose project id corresponds to the project id of your Dialogflow agent, which we noted in the last step.
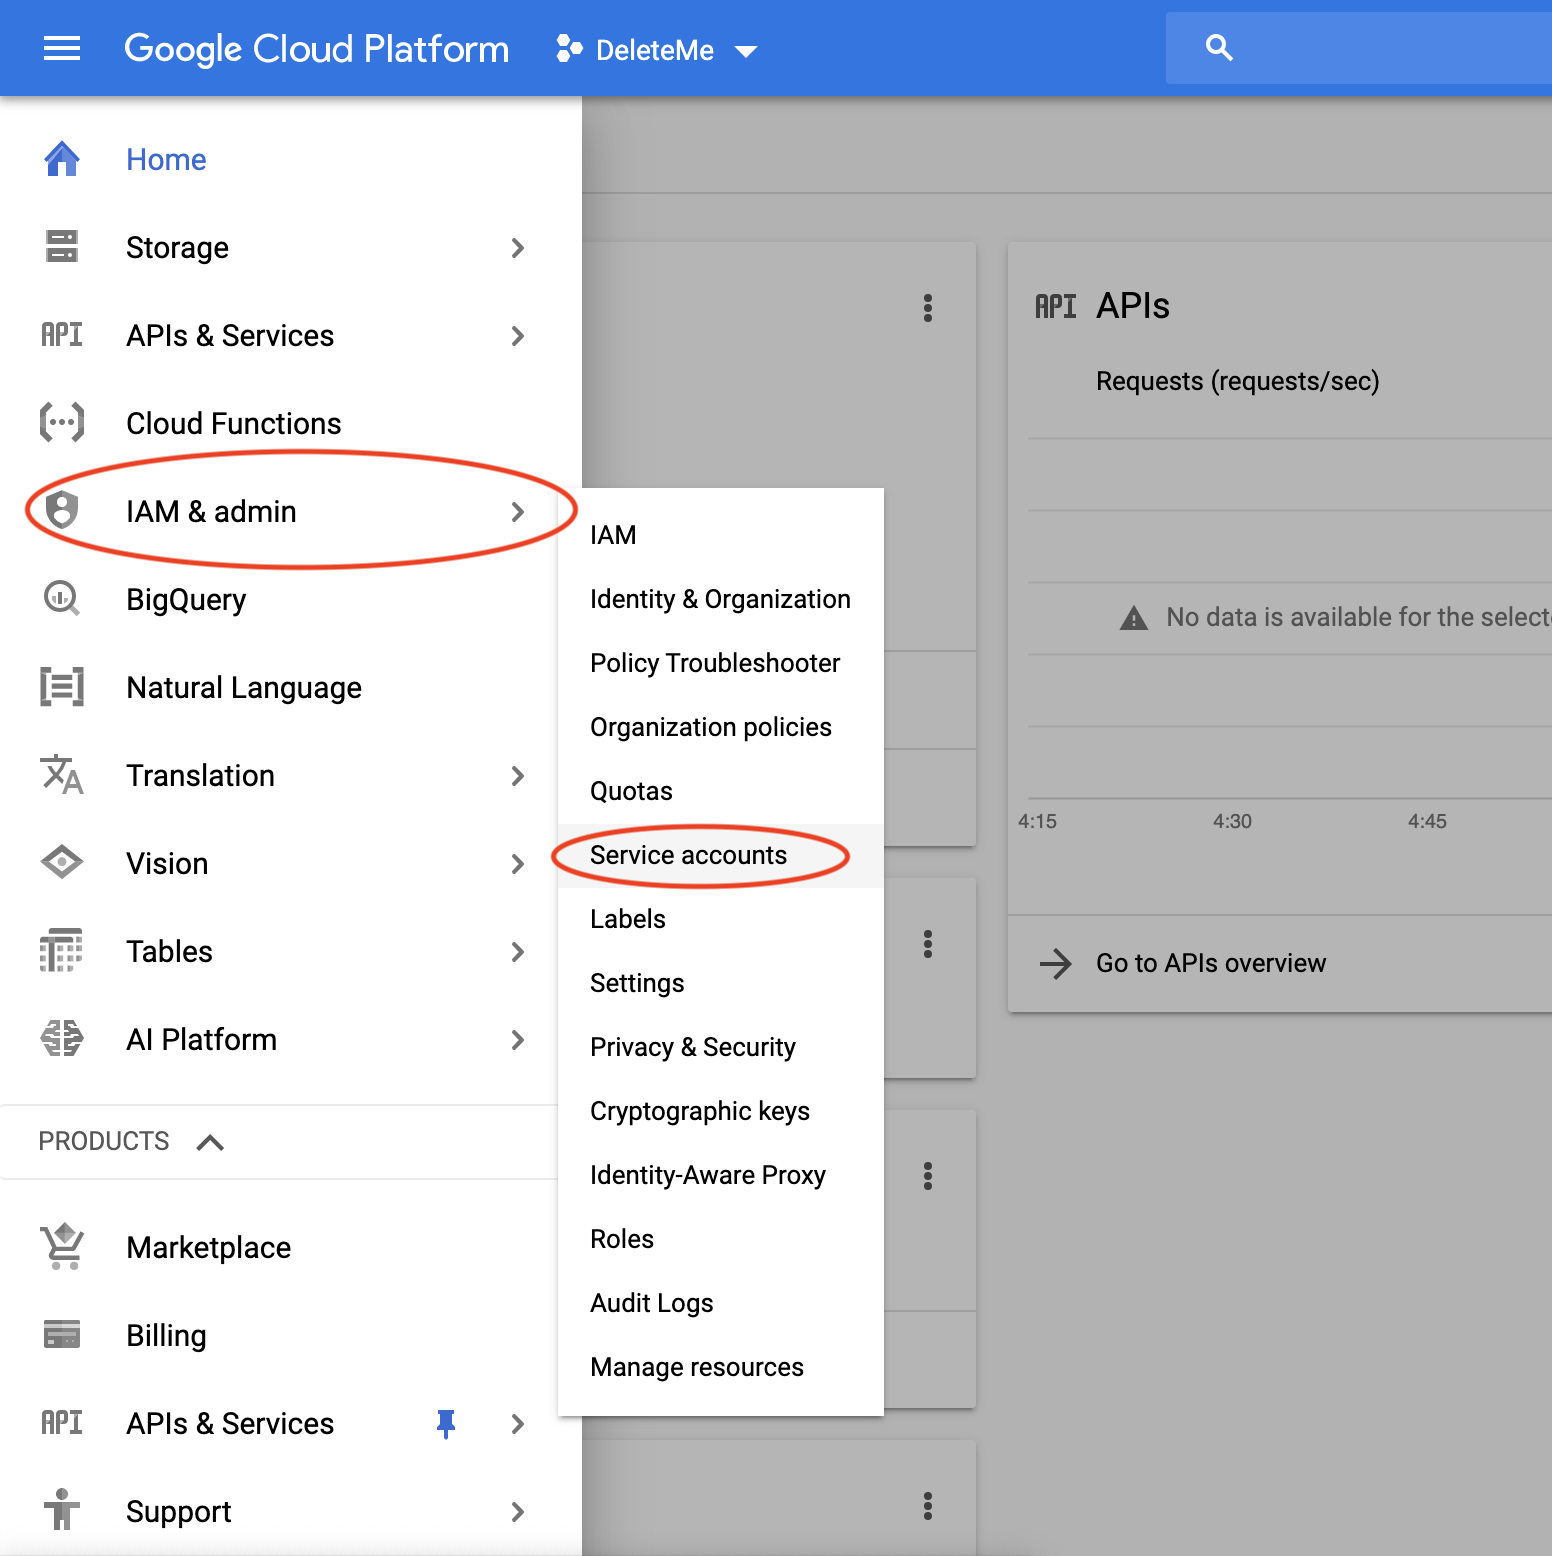
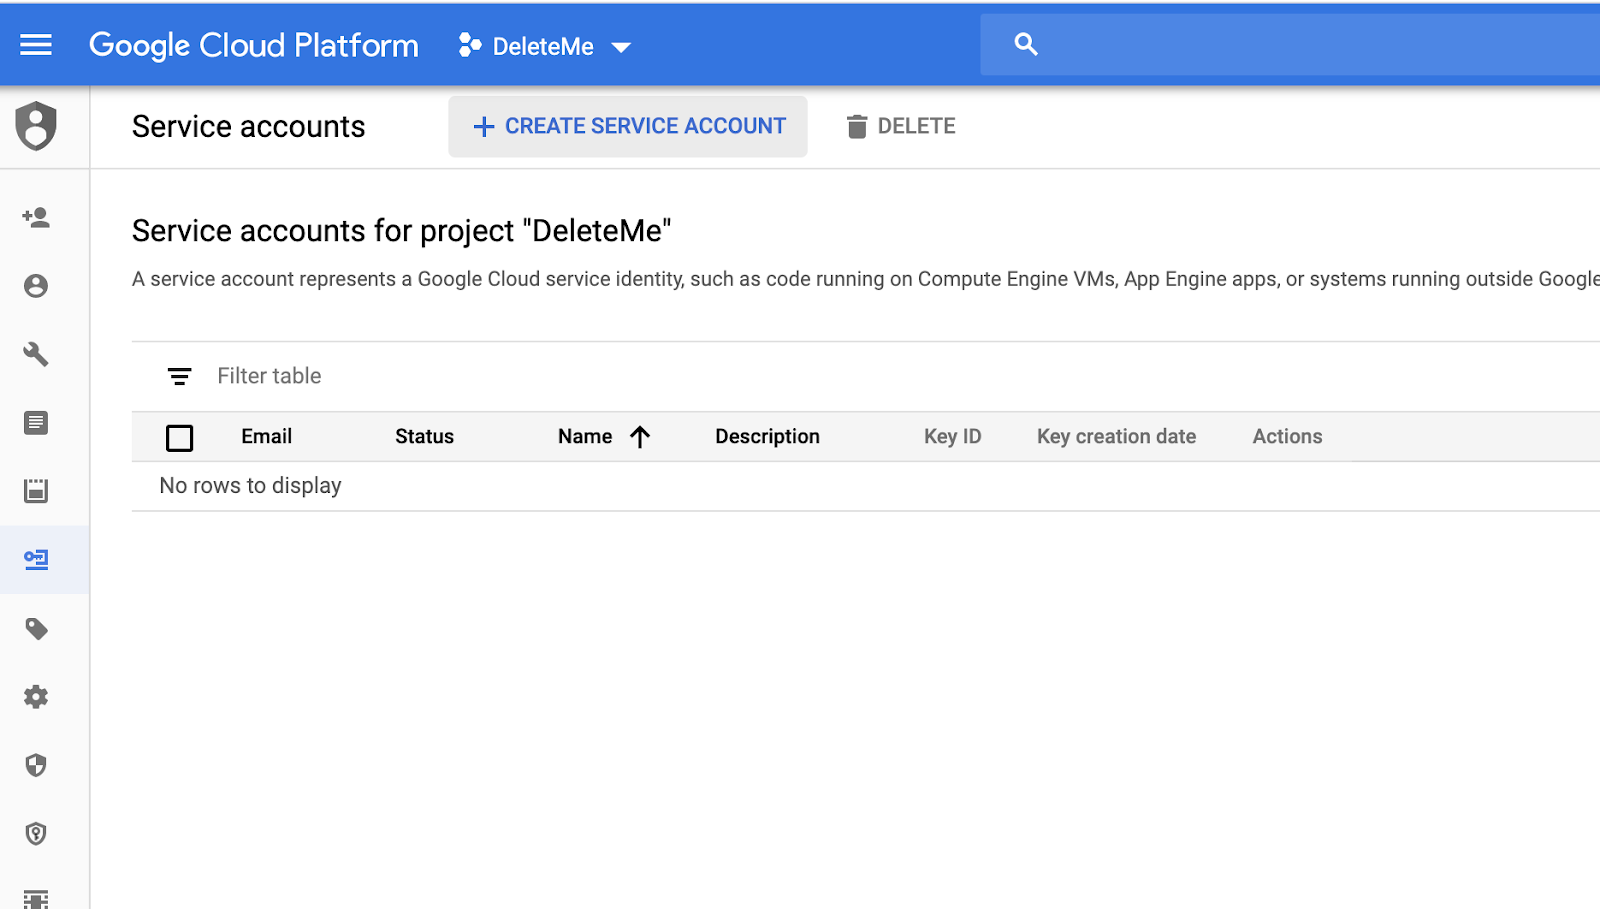
In the left hand bar, go to IAM & admin -> Service accounts.
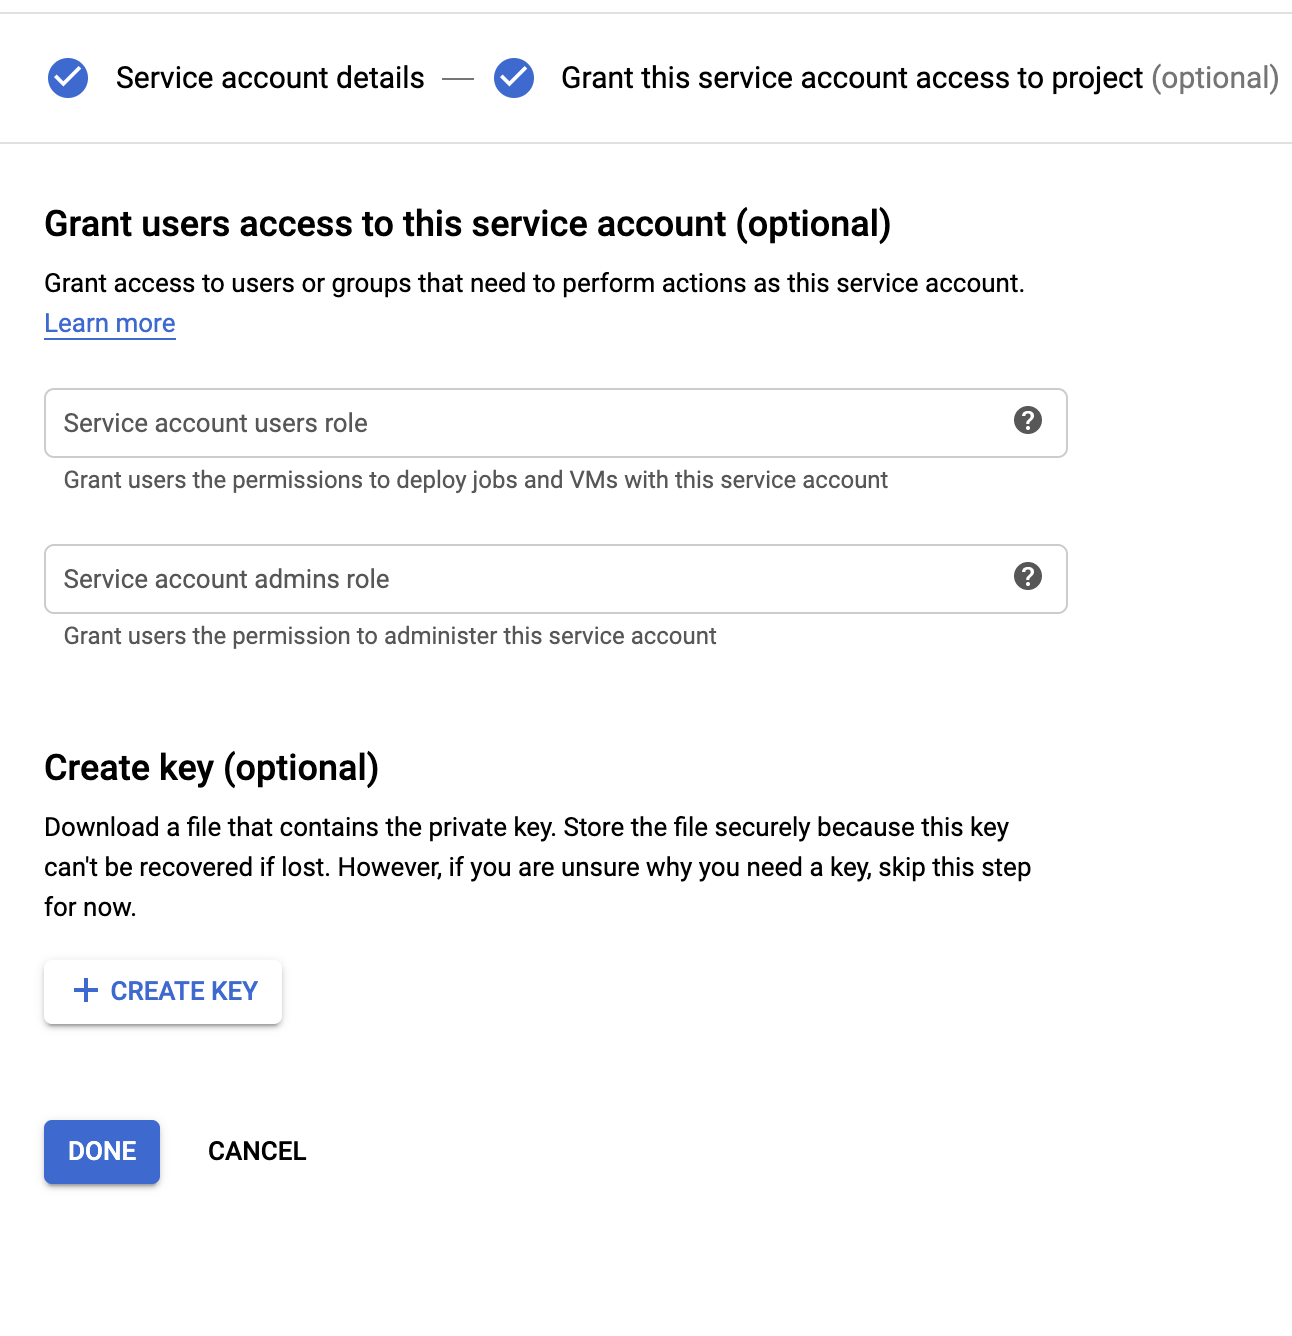
If you downloaded the key file directly onto your Raspberry Pi, you’ve saved yourself a step. Otherwise, you need to transfer it from your laptop/desktop over to the Pi. There are many ways to do this, but you might try the command-line program scp.
In order to authenticate, most Google Cloud tools expect the environmental variable GOOGLE_APPLICATION_CREDENTIALS to point to a key file. So make sure to set that variable:
export GOOGLE_APPLICATION_CREDENTIALS="/path/to/your/key.json"
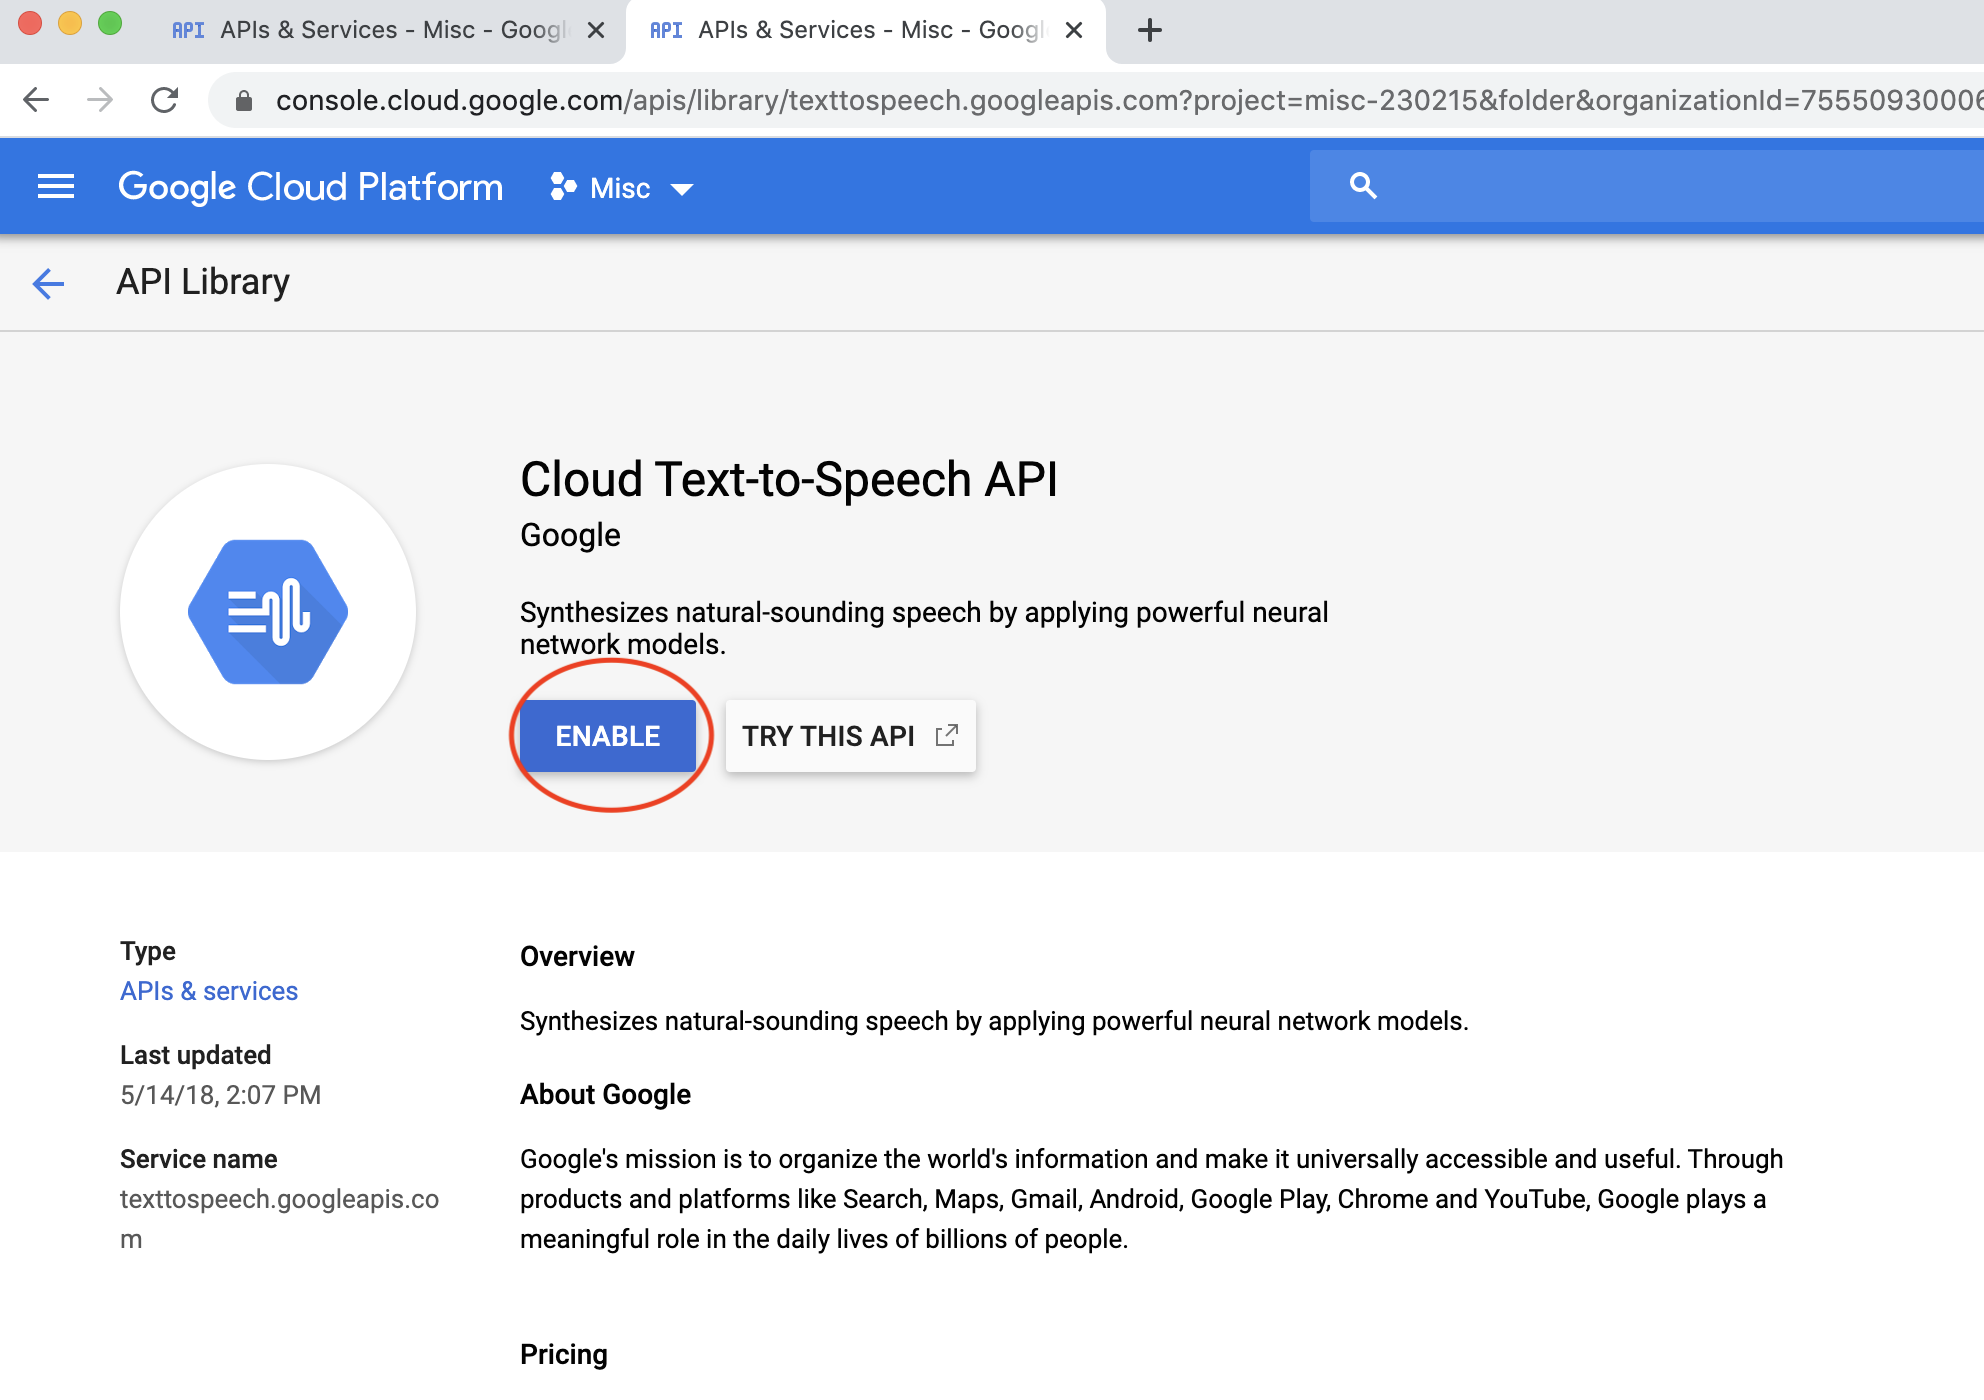
Enabling Text-to-Speech
Next, you’ll need to enable Google’s Text-to-Speech API. Navigate here and click “Enable”:
For this project, we’ll be writing code to connect to Dialogflow from the Raspberry Pi in Node.js, which is very similar to vanilla Javascript. Unfortunately, the Raspberry Pi pre-installed version of Node isn’t recent enough to support the packages we’ll be using, so you’ll need to reinstall it, as well as reinstall NPM, the Node Package Manager. Sadly, installation isn’t as straightforward as it probably should be, but I advise following this tutorial.
Install Dependencies
All of the code you’ll need to run your Dialogflow agents from your device/Raspberry Pi can be found in talking_to_machines/trivia_alarm/raspi. Navigate to this folder.
First, you’ll need to download some dependencies. For this alarm, we’ll use the package node-record-lpcm16 to record audio from the Pi’s microphone and the package node-speaker to play audio responses from Dialogflow through the speaker.
To install node-record-lpcm16, you may need to install some dependencies, like sox, first. See the docs here, but likely you’ll need to do something like:
sudo apt-get install sox libsox-fmt-all
npm install node-record-lpcm16
To install node-speaker:
sudo apt-get install libasound2-dev
npm install speaker
Finally, install everything else:
npm install pump dotenv dialogflow-v2
Configure .env Values
Now that we’ve downloaded the code and dependencies, we’ll need to some environmental configuration. Navigate to the raspi directory and run:
cp .env_template .env
This .env file will be loaded by our Node.js scripts using the dotenv library. In a text editor, open the new .env file you’ve just created. It should look like this:
RASPI=trueBUTTON_PIN=23GOOGLE_APPLICATION_CREDENTIALS="PATH TO YOUR CREDS"ALARM_PROJECT_ID="YOUR ID"TRIVIA_PROJECT_ID="YOUR ID"
The top two variables here — RASPI and BUTTON_PIN — configure our software for running on an AIY Voice Kit and using the included pushbutton. If you’re not using this kit, set RASPI=false.
Set GOOGLE_APPLICATION_CREDNETIALS to the path of the credentials file you downloaded before (i.e. /Users/pi/home/key.json). Fill in ALARM_PROJECT_ID with the project id we noted before. You can leave TRIVIA_PROJECT_ID blank for now (we’ll come back to that when we add the trivia program to our trivia alarm clock).
Running the App
Congratulations, you’re ready to run code! Turn the volume up and, in the raspi directory, run node run_alarm.js. You should see:
"Creating alarm sound from TTS API..."
appear in the Terminal.
If you’re running this on your laptop or some device with a keyboard, hit “enter” to start conversing. On the AIY Voice Kit, hit push button.
You should see Got key press or Got button press. Next, say something like:
“Set an alarm” or
“Set my alarm for 8 AM” or
“List my alarms” or
“Delete my alarm”
If everything’s set up correctly, your device should respond by speaking a reply, like, “I set your alarm for 8 AM.” If that happens, good work — you now have a functional voice-powered alarm clock. 😎⏰
Choosing an Alarm Sound
It’s true that we don’t yet have a functioning trivia alarm clock, but do at this point have an alarm that says “This is your alarm. It’s time to wake up” and plays a little bugle tune. That sound comes from a free Google Assistant library of sounds. If you want to change the alarm to something else, find a nice alarm sound here and copy its link (i.e. [https://actions.google.com/sounds/v1/alarms/spaceship_alarm.ogg](https://actions.google.com/sounds/v1/alarms/spaceship_alarm.ogg)). Then, in raspi/run_alarm.js, modify this function, replacing the url in src with the url you copied.
async function createAlarmSound() {
    const ssml = `<speak><audio src="https://actions.google.com/sounds/v1/alarms/bugle_tune.ogg"></audio>This is your alarm. It's time to wake up.</speak>`;
    return await tts(ssml);
}
You can also change the text here so that your alarm says something besides “This is your alarm” when it wakes you up.
What Did We Do?
In Part 1, we built a Dialogflow agent that handled a lot of the logic of this alarm-setting voice user interface. Here, in Part 2, we got Dialogflow streaming on our Raspberry Pi, streaming audio in through the microphone and out through the speakers. We also used Dialogflow’s intent recognition to allow us to respond to user requests, for example, by actually setting an alarm at a specified time or by deleting that alarm.
If you want to know more about streaming Dialogflow on devices, check out this very in-depth post I wrote about the topic. In our project directory, that post talks about the code located in talking_to_machines/js_utils/DialogflowStream.js.
Meanwhile, to understand the code that fulfills intents, I recommend reading the code itself, which I have extensively commented 😉. The workhorse of this alarm, besides Dialogflow, is node-cron, a Node implementation of the popular cron tool.
What’s Next?
Now that we have a basic alarm working, let’s make it cooler and more effective by adding trivia, here in this third (and final!) trivia alarm clock post.
Missing important details from this post? Leave a comment below and I’ll fill them in!
Comments