I Built an AI Stylist Inspired by Social Media
Last year, in a universe where it still made sense to own pants, I decided to hire a personal stylist.
In our first appointment, the stylist came to my apartment and took pictures of every clothing item I owned.
In our second appointment, she met me at Nordstrom's, where she asked me to try on a $400 casual dress, a $700 blazer, and $300 sneakers. (I never thought to ask if she worked on commission.)
But only after our third and final appointment, when she finally sent me a folder full of curated "looks" made from my new and old clothing items, did it finally click: I'd just blown a lot of money.
I had a suspicion we were on different pages when, as we walked through the shoes section at Nordstrom, the stylist said, "The problem with you people in tech is that you're always looking for some kind of theory or strategy or formula for fashion*.* But there is no formula--it's about taste."
Pfffft. We'll see about that!
I returned the pricey clothing and decided to build my own (cheaper!) AI-powered stylist. In this post, I'll show you how you can, too.
Want to see a video version of this post? Check out:
My AI Stylist was half based on this smart closet from the movie Clueless:
and half based on the idea that one way to dress fashionably is to copy fashionable people. Particularly, fashionable people on Instagram.
The app pulls in the Instagram feeds of a bunch of fashion "influencers" on Instagram and combines them with pictures of clothing you already own to recommend you outfits. Here's what it looks like:
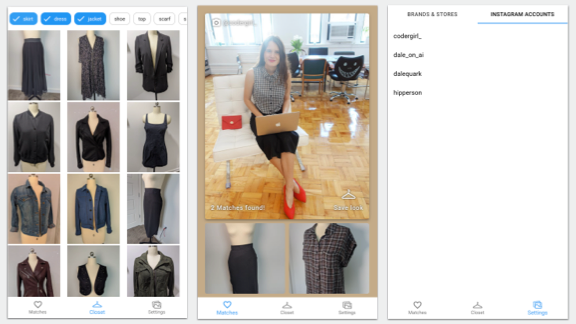
(You can also check out the live app here.)
On the left pane--the closet screen--you can see all the clothing items I already own. On the right pane, you'll see a list of Instagram accounts I follow for inspiration. In the middle pane (the main screen), you can see the actual outfit recommendations the AI made for me. The Instagram inspiration picture is at the top, and items for my closet are shown below:
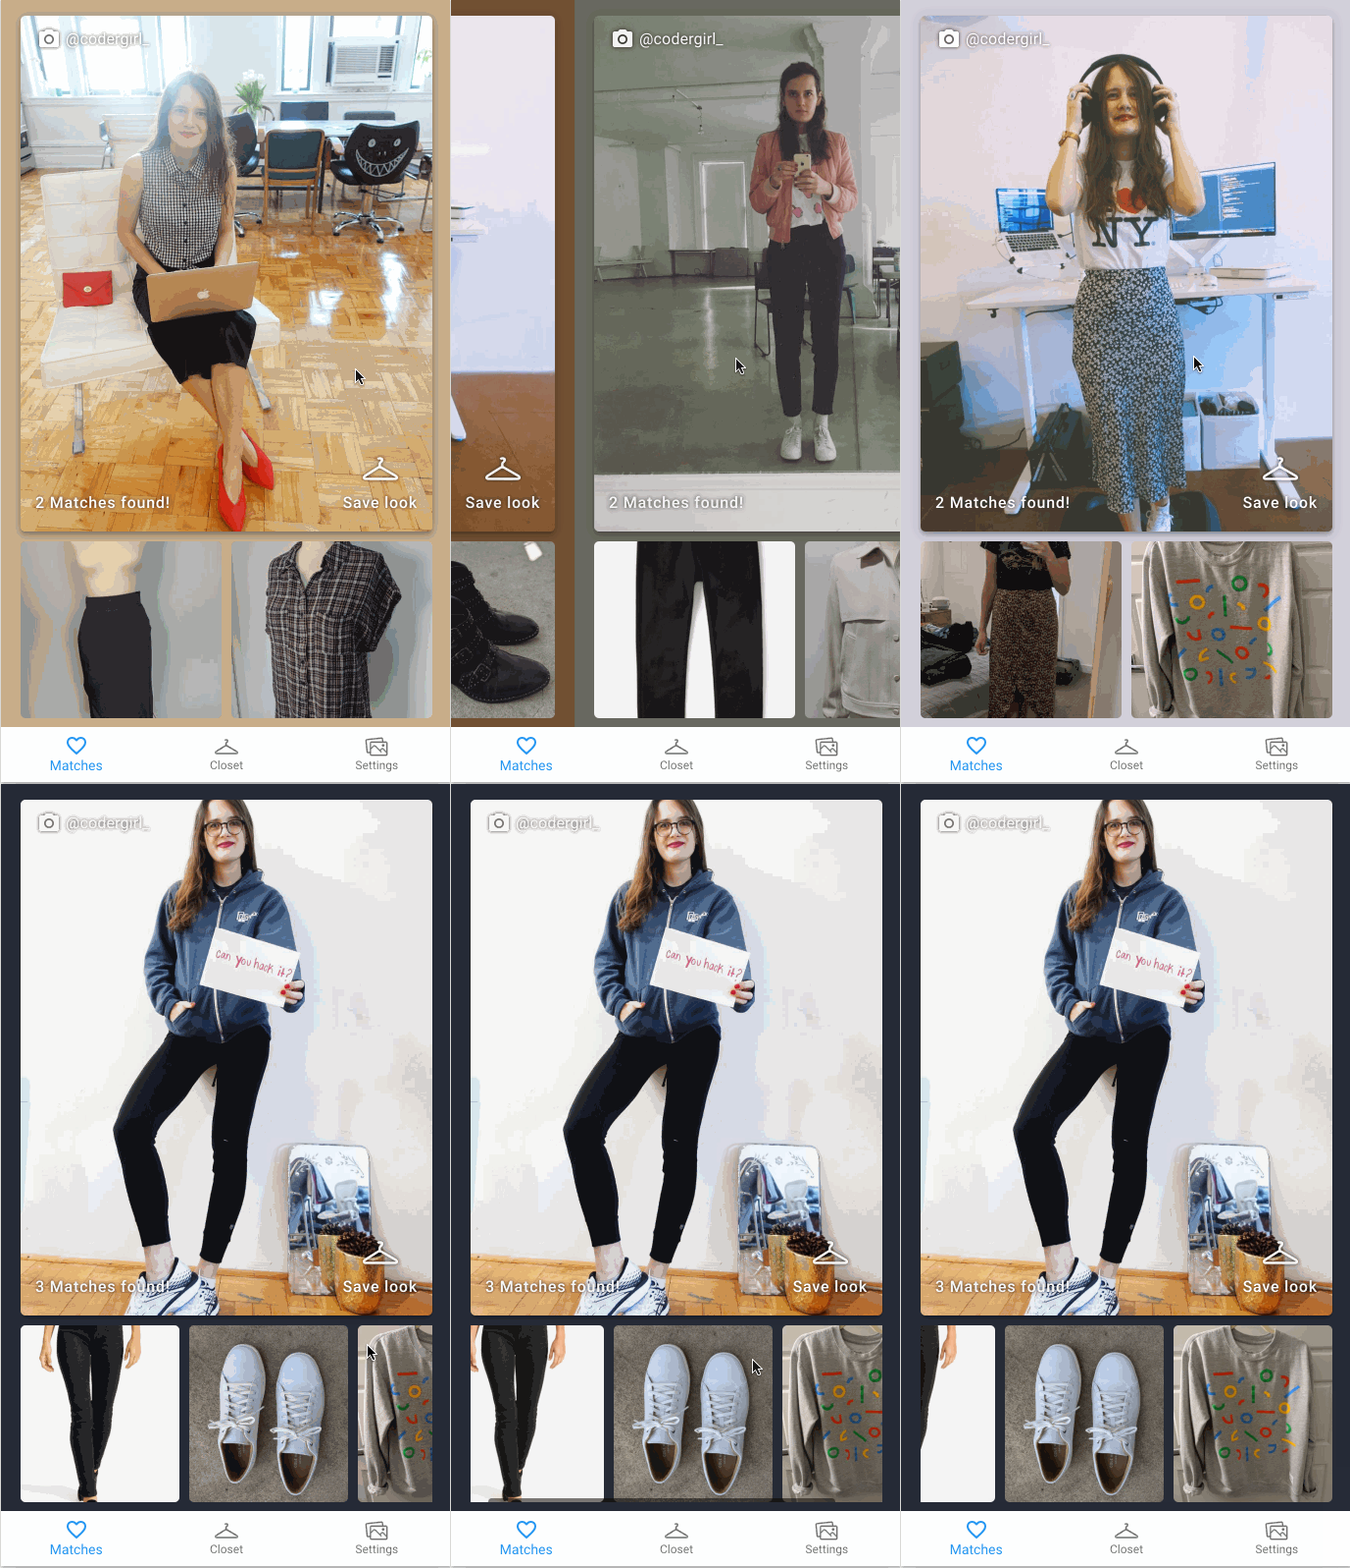
Here my style muse is Laura Medalia, an inspiring software developer who's @codergirl_ on Instagram (make sure to follow her for fashion and tips for working in tech!).
The whole app took me about a month to build and cost ~$7.00 in Google Cloud credits (more on pricing later). Let's dive in.
The Architecture
I built this app using a combination of Google Cloud Storage, Firebase, and Cloud Functions for the backend, React for the frontend, and the Google Cloud Vision API for the ML bits. I divided the architecture into two bits.
First, there's the batch process, which runs every hour (or however frequently you like) in the Cloud:

"Batch process" is just a fancy way of saying that I wrote a Python script which runs on a scheduled interval (more on that later). The process:
- Pulls photos from social media
- Uses the Vision API's Product Search feature to find similar items in my closet
- Scores the matches (i.e. of all the social media pictures, which can I most accurately recreate given clothing in my closet?)
- Writes the matches to Firestore
This is really the beefy part of the app, where all the machine learning magic happens. The process makes outfit recommendations and writes them to Firestore, which is my favorite ever lightweight database for app development (I use it in almost all my projects).
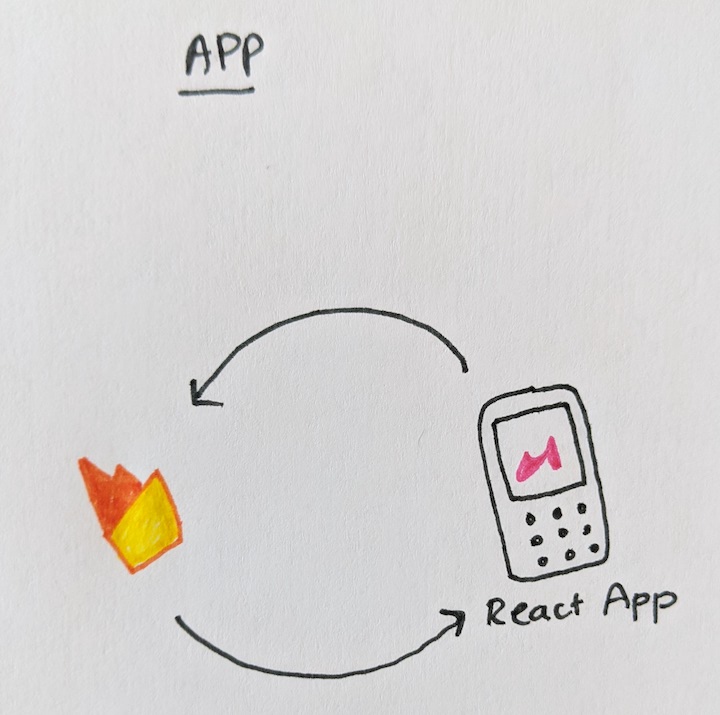
The actual app (in this case, just a responsive web app) is simple: it just reads the outfit recommendations from Firestore and displays them in a pretty interface:
Let's take a look!
Grabbing Social Media Data
Ideally, I wanted my app to pull pictures from Instagram automatically, based on which accounts I told it to follow. Unfortunately, Instagram doesn't have an API (and using a scraper would violate their TOS). So I specifically asked Laura for permission to use her photos. I downloaded them to my computer and then uploaded them to a Google Cloud Storage bucket:
# Create a cloud storage bucket
gsutil mb gs://inspo-pics-bucket

# Upload inspiration pics
gsutil cp path/to/inspo/pics/*.jpg gs://inspo-pics-bucket
Filtering for Fashion Pics
I like Laura's account for inspiration because she usually posts pictures of herself in head-to-toe outfits (shoes included). But some pics on her account are more like this:
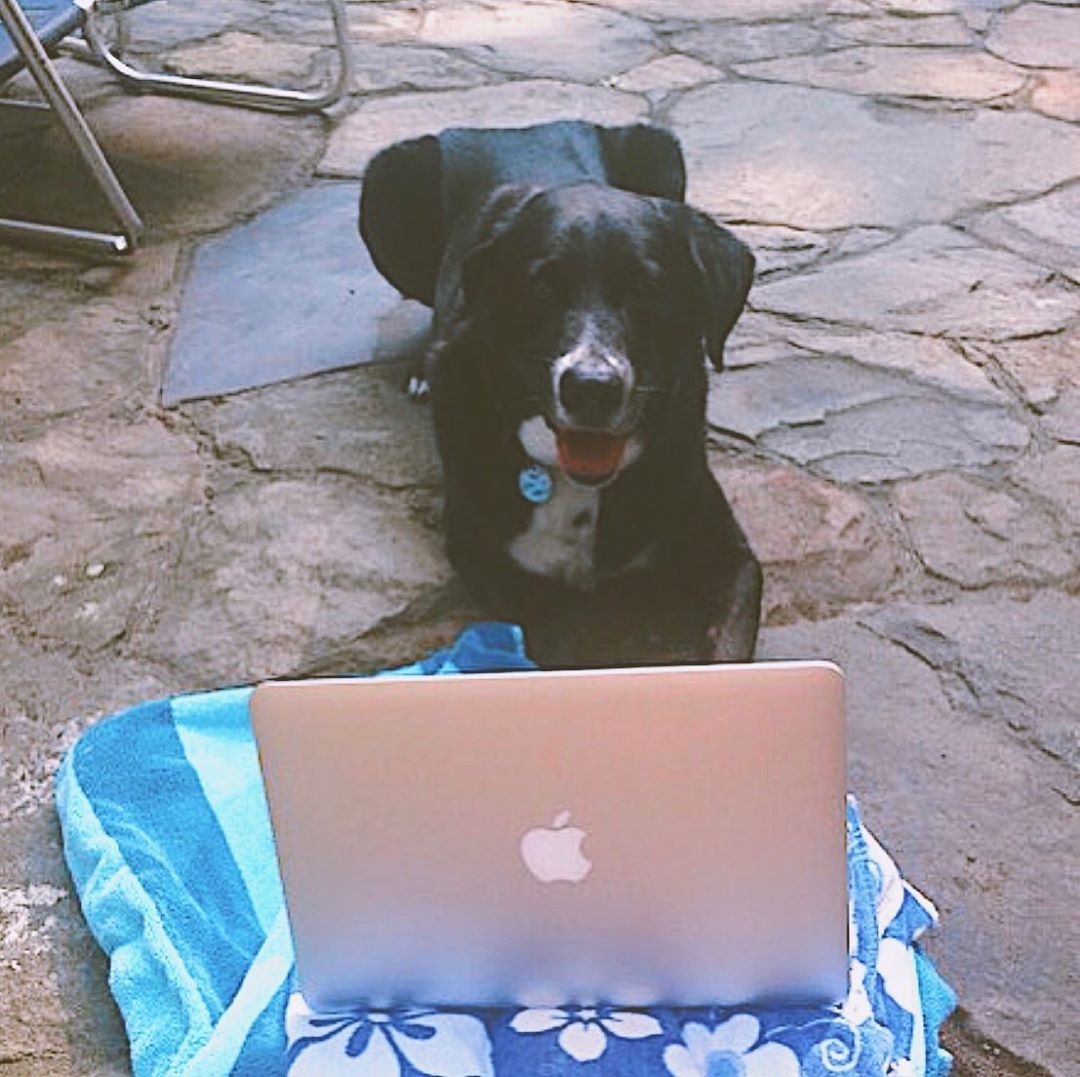
Adorable, yes, but I can't personally pull off the dressed-in-only-a-collar look. So I needed some way of knowing which pictures contained outfits (worn by people) and which didn't.
For that, I turned to my trusty steed, the Google Cloud Vision API (which I use in many different ways for this project). First, I used its classification feature, which assigns labels to an image. Here's the labels it gives me for a picture of myself, trying to pose as an influencer:
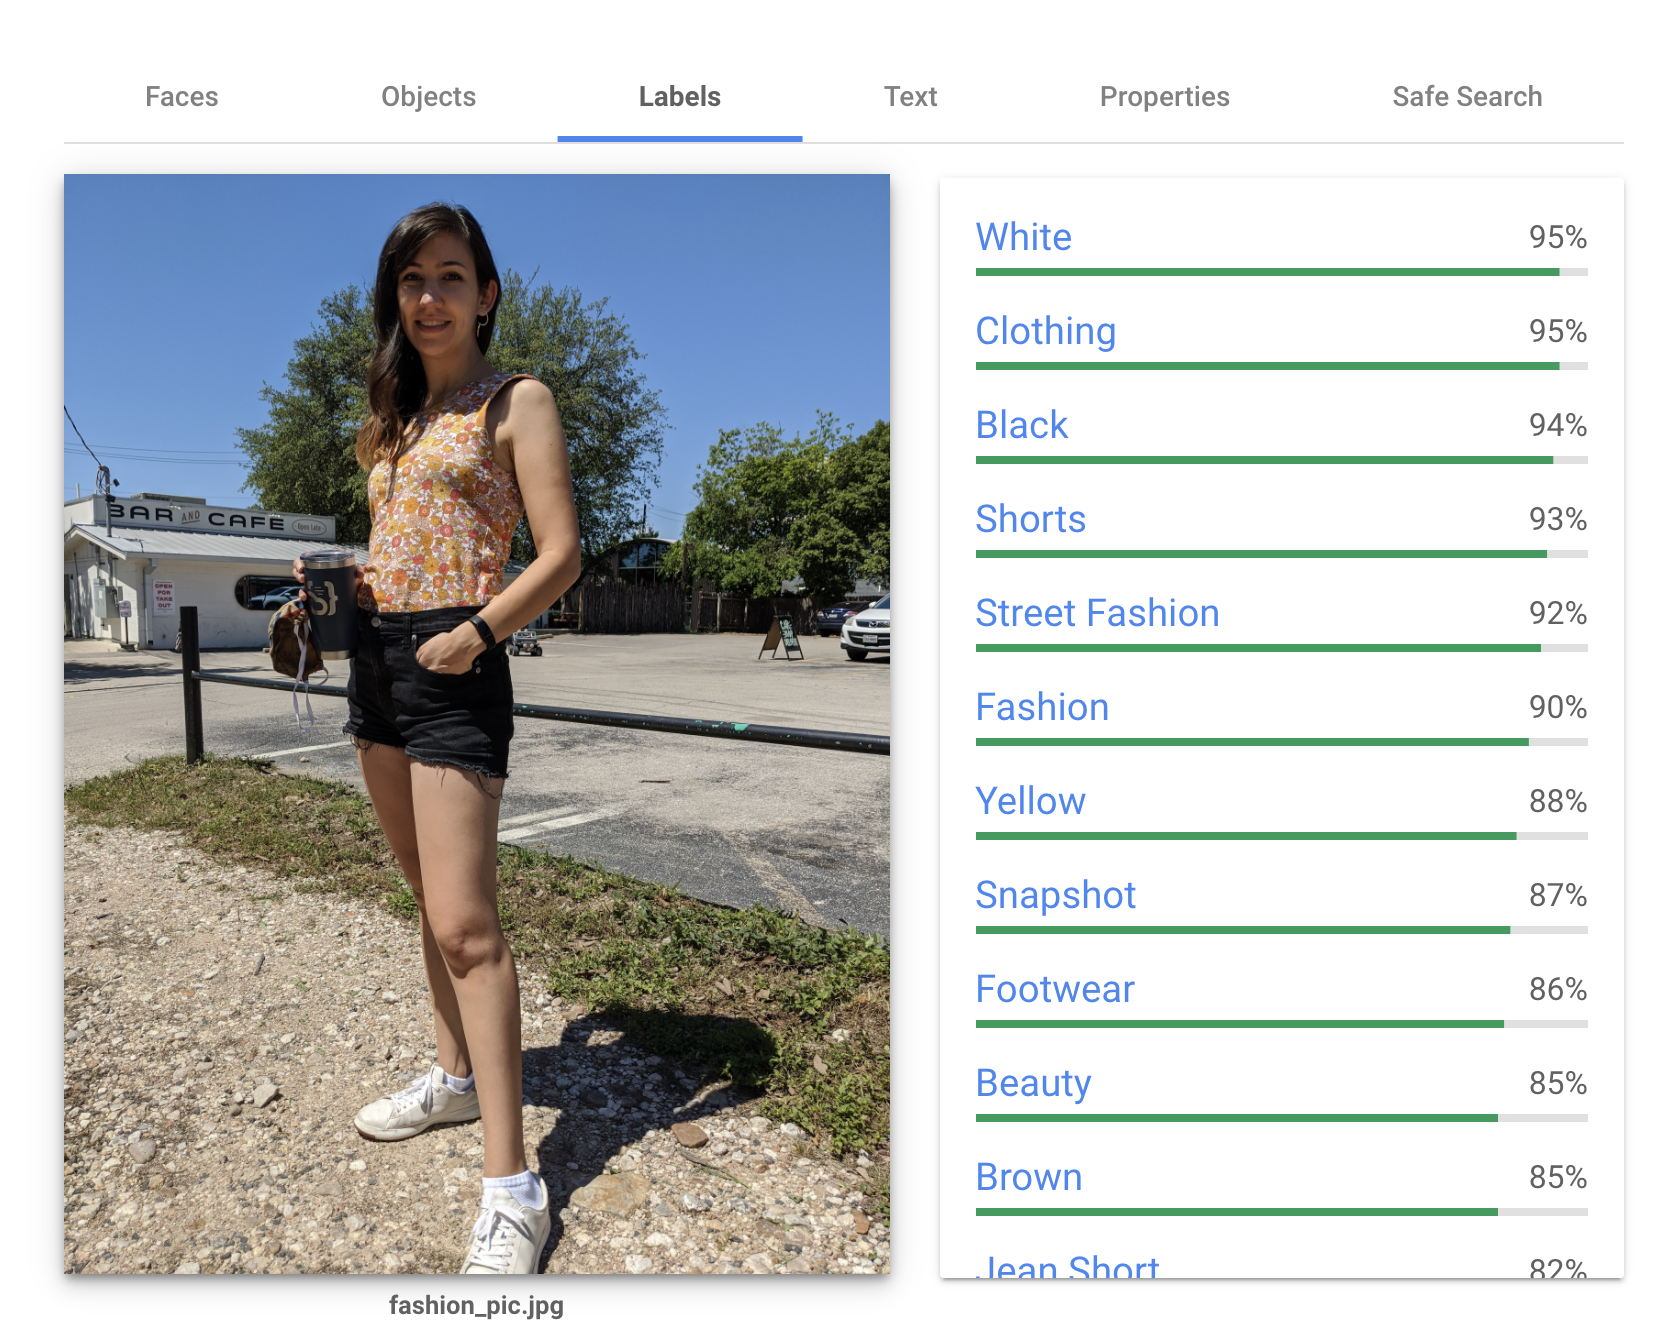
The labels are ranked by how confident the model is that they're relevant to the picture. Notice there's one label called "Fashion" (confidence 90%). To filter Laura's pictures, I labeled them all with the Vision API and removed any image that didn't get a "Fashion" label. Here's the code:
from google.cloud import vision
from google.cloud.vision import types

# Path to all my inspo pics in the cloud
uris = [
  "gs://inspo-pics-bucket/pic1.jpg",
  "gs://inspo-pics-bucket/pic2.jpg",
  ...
 ]

# Create a Vision API Client
client = vision.ImageAnnotatorClient()

# Keep track of all the fashion pics
fashionPics = []

for uri in uris:
  image_source = vision.types.ImageSource(image_uri="gcs/path/to/file")
  labels = client.label_detection(image=image).label_annotations
  # Only save images that have the label "Fashion"
  if any([x.description == "Fashion" for x in labels]):
    fashionPics.append(uri)
If you want the full code, check it out here.
Digitizing my Closet
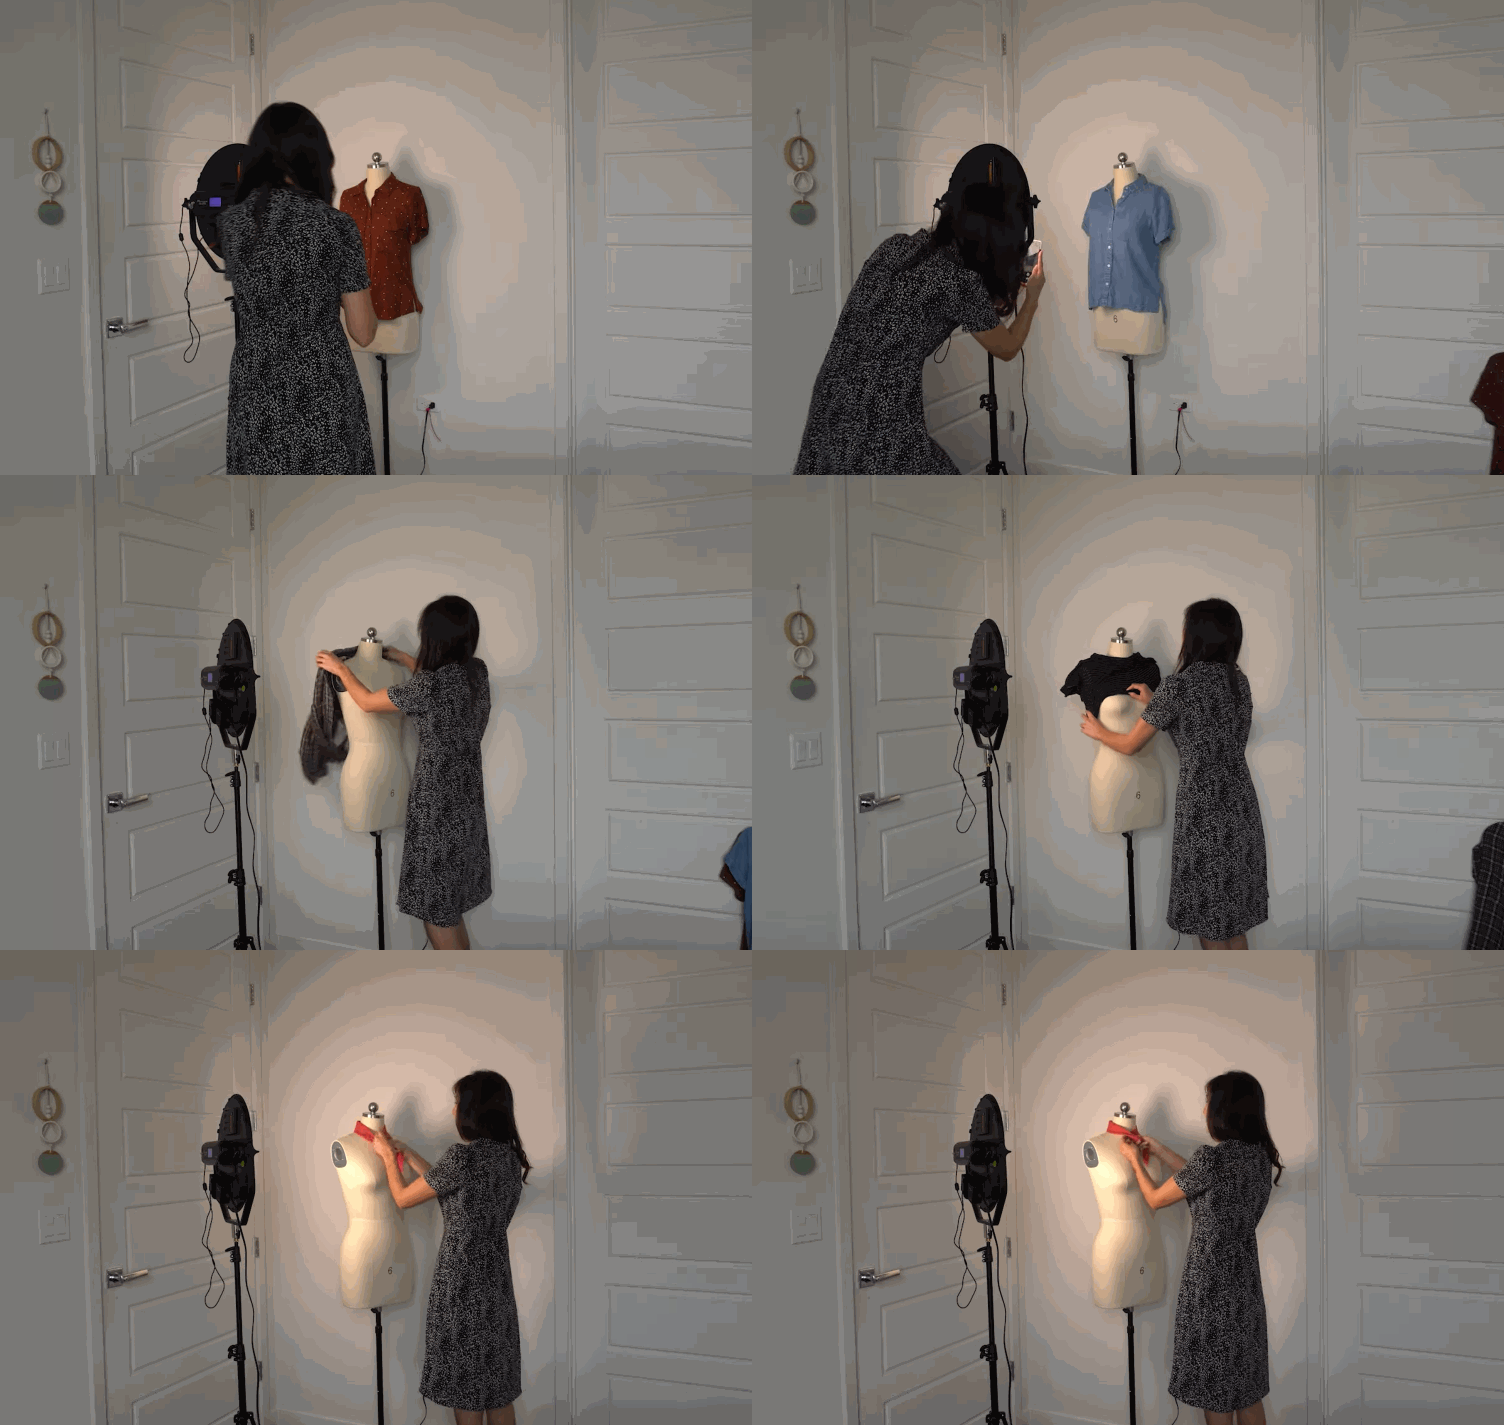
Now the goal is to have my app look at Laura's fashion photos and recommend me items in my closet I can use to recreate them. For that, I had to take a pictures of item of clothing I owned, which would have been a pain except I happen to have a very lean closet.
I hung each item up on my mannequin and snapped a pic.
Using the Vision Product Search API
Once I had all of my fashion inspiration pictures and my closet pictures, I was ready to start making outfit recommendations using the Google Vision Product Search API.
This API is designed to power features like "similar product search." Here's an example from the Pinterest app:

IKEA also built a nice demo that allows customers to search their products via images with this kind of tech:
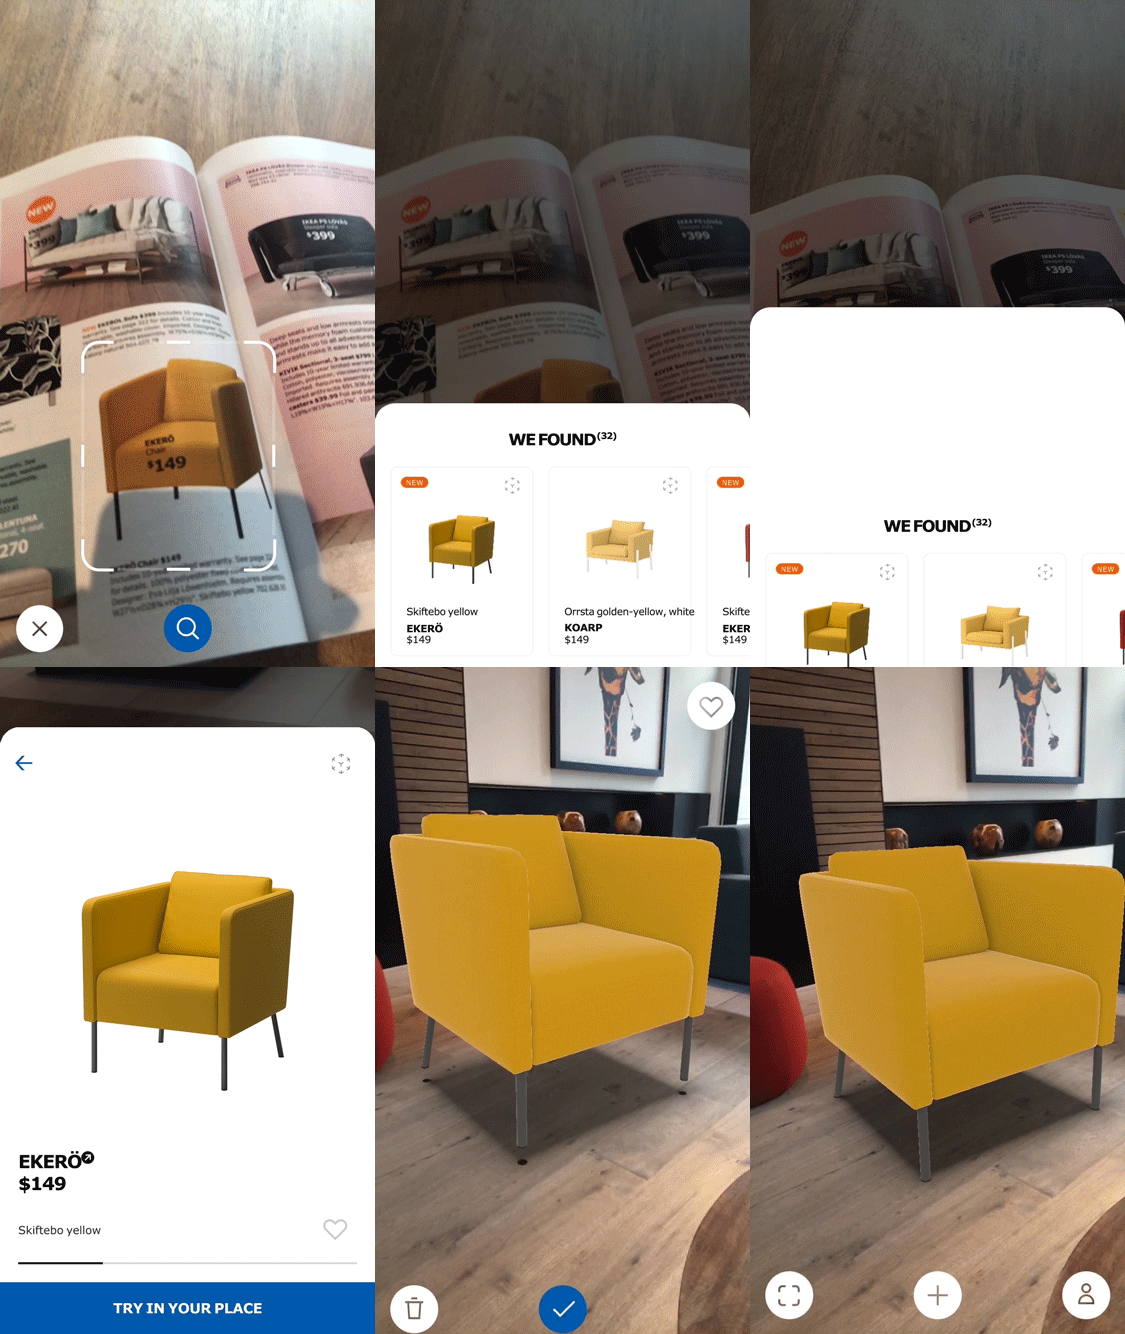
I'm going to use the Product Search API in a similar way, but instead of connecting a product catalog, I'll use my own wardrobe, and instead of recommend similar individual items, I'll recommend entire outfits.
To use this API, you'll want to:
- Uploading your closet photos to Cloud Storage
- Create a new Product Set using the Product Search API
- Create a new product for each item in your closet
- Upload (multiple) pictures of those products
At first I attempted this using the official Google Python client library, but it was a bit clunky, so I ended up writing my own Python Product Search wrapper library, which you can find here (on PyPi). Here's what it looks like in code:
from visionproductsearch.ProductSearch import ProductSearch, ProductCategories

# Initialize ProductSearch with your credentials
# Pass a path to the storage bucket where you'd like to save image files
ps = ProductSearch(`my_gcp_project_id`, 'us-west1', 'path/to/creds.json', 'my_gcp_bucket_name' )

# Create a new product set
productSet = ps.createProductSet('my_test_set')

# Create a new product
product = ps.createProduct('my_fancy_shirt', ProductCategories.APPAREL)

# Add a reference image to a product
product.addReferenceImage('./skirt_pic.jpg')

# List all reference images for a product
for img in product.listReferenceImages():
    print(img)

# Add a product to a product set
product.addProduct(product)

# List all products in a product set
for p in productSet.listProducts():
    print(p)

# Search for similar products by image
productSet.search(ProductCategories.APPAREL, file_path='img/to/search.jpg')
Note this wrapper library handles uploading photos to a Cloud Storage bucket automatically, so you can upload a new clothing item to your product set from a local image file:
# Create a new product
product = ps.createProduct('my_fancy_shirt', ProductCategories.APPAREL)

# Add a reference image to a product
product.addReferenceImage('./skirt_pic.jpg')
If you, dear reader, want to make your own product set from your own closet pics, I wrote a Python script to help you make a product set from a folder on your desktop. Just:
- Download the code from GitHub and navigate to the instafashion/scripts folder:
# Download the code
git clone git@github.com:google/making_with_ml.git

# CD into the right folder
cd making_with_ml/instafashion/scripts
- Create a new folder on your computer to store all your clothing items (mine's called
my_closet):
mkdir my_closet
cd my_closet
- Create a new folder for each clothing item and put all of your pictures of that item in the folder:
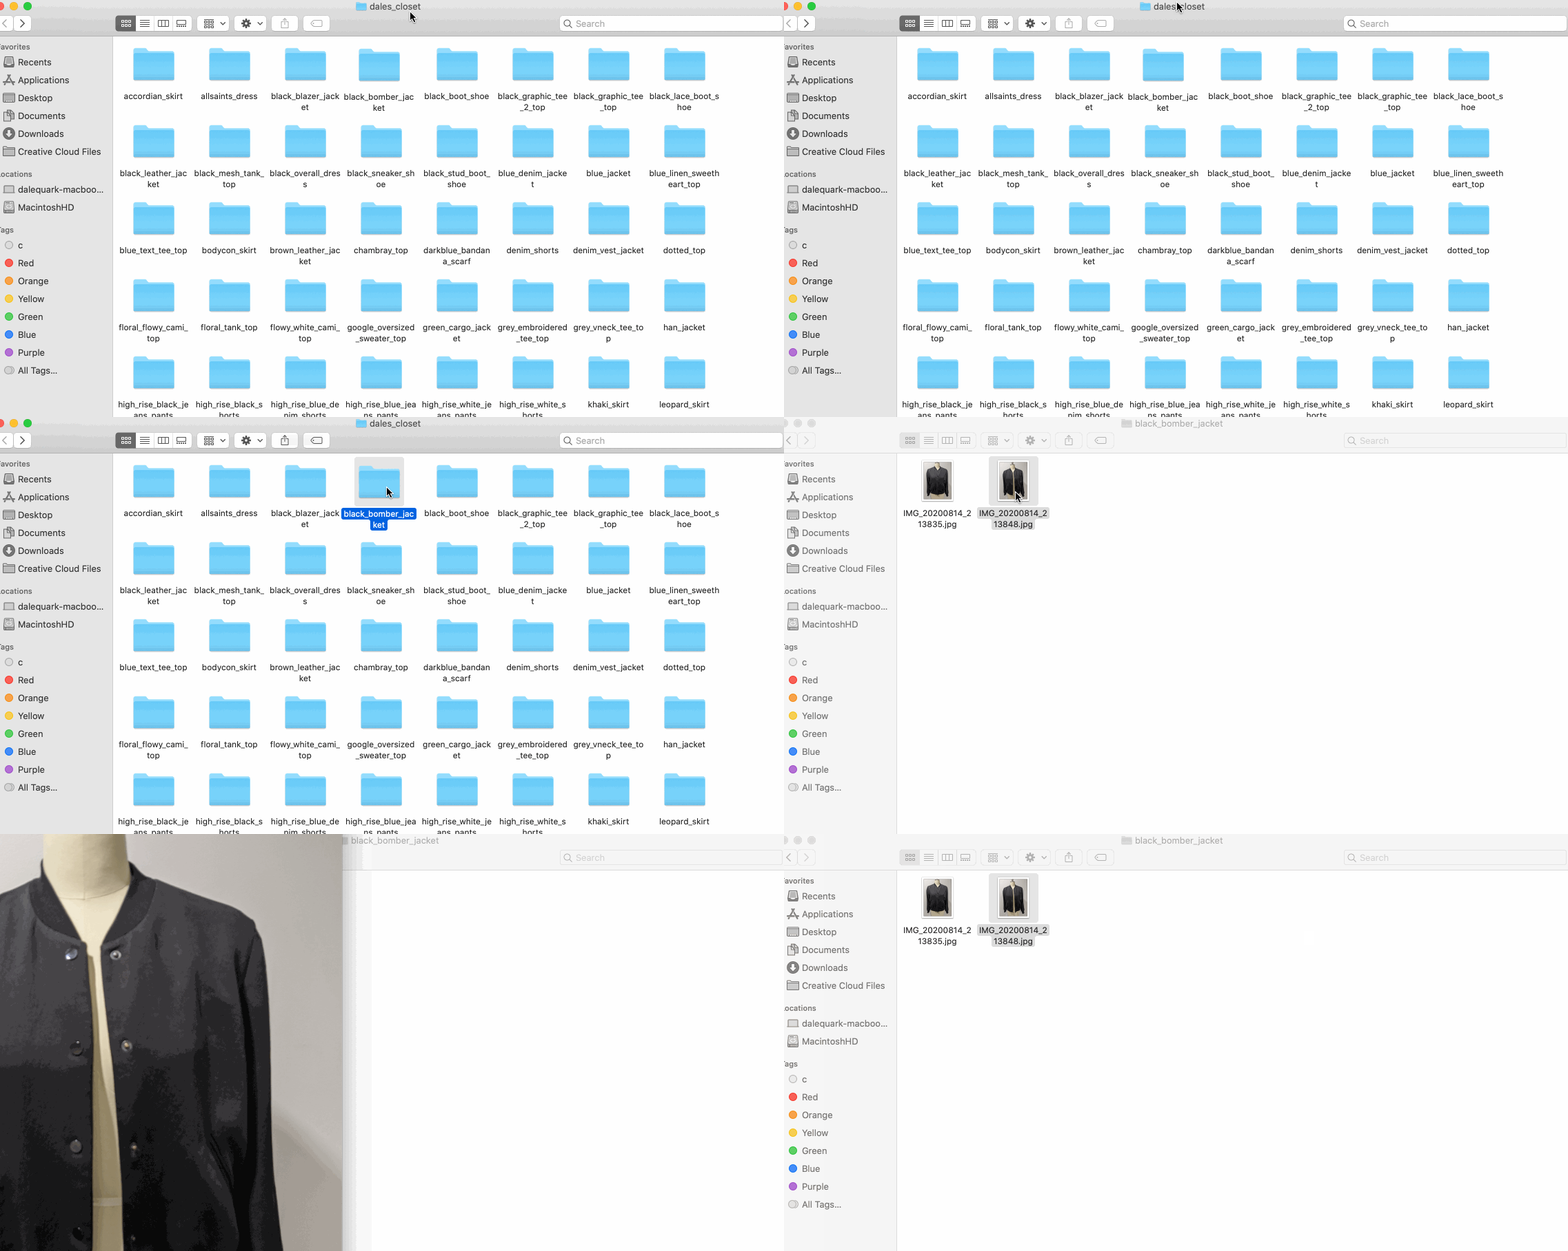
So in the gif above, all my black bomber pics are in a folder named black_bomber_jacket.
To use my script, you'll have to name your product folders using the following convention: name_of_your_item_shoe where shoe can be any of [skirt, dress, jacket, top, shoe, shorts, scarf, pants].
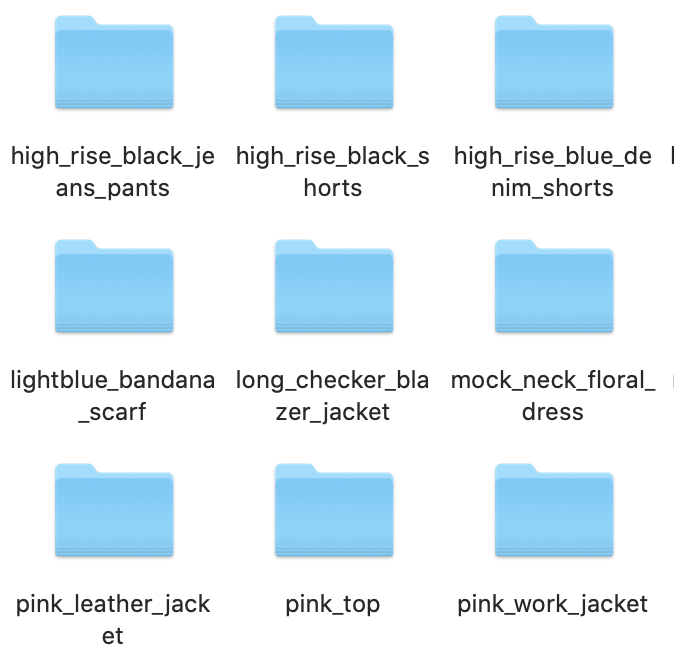
- After creating your directory of product photos, you'll need to set up some config by editing the `.env_template` file:
cp .env_template .env

# In the .env file, fill out these fields:
export PROJECTID="YOUR_GCP_PROJECT_ID"
export BUCKET="YOUR_CLOSET_STORAGE_BUCKET"
export CREDS="path/to/key.json"
export CLOSET_DIR="./my_closet"
export PRODUCT_SET="PRODUCT_SET_NAME"
(Oh, by the way: you need to have a Google Cloud account to use this API! Once you do, you can create a new project and download a credentials file.)
- Then install the relevant Python libraries and run the script
product_set_from_dir.py:
> pip install -r requirements.txt
> python product_set_from_dir.py
"Added 200 products to set"
Phew, that was more steps than I thought!
When you run that Python script, product_set_from_dir.py, your clothing photos get uploaded to the cloud and then processed or "indexed" by the Product Search API. The indexing process can take up to 30 minutes, so go fly a kite or something.
Searching for Similar Items
Once your product set is done indexing, you can start using it to search for similar items. Woohoo! 🎊
In code, just run:
# Create a Product Search client
ps = ProductSearch("YOUR_GCP_PROJECTID", "path/to/creds.json", "YOUR_CLOSET_BUCKET")
# Grab the product set you just created
productSet = ps.getProductSet("YOUR_PRODUCT_SET_NAME")

# Call "search" with a path to an inspiration picture
results = ProductSet.search(ProductCategories.APPAREL, image_uri="gs://path/to/inspo.jpg")

''' Returns:
{'score': 0.7648860812187195,
  'label': 'Shoe',
  'matches': [{'product': <pyvisionproductsearch.ProductSearch.ProductSearch.Product at 0x14992d2e0>,
    'score': 0.35719582438468933,
    'image': 'projects/yourprojectid/locations/us-west1/products/high_rise_white_jeans_pants/referenceImages/6550f579-6b26-433a-8fa6-56e5bbca95c1'},
   {'product': <pyvisionproductsearch.ProductSearch.ProductSearch.Product at 0x14992d5b0>,
    'score': 0.32596680521965027,
    'image': 'projects/yourprojectid/locations/us-west1/products/white_boot_shoe/referenceImages/56248bb2-9d5e-4004-b397-6c3b2fb0edc3'},
   {'product': <pyvisionproductsearch.ProductSearch.ProductSearch.Product at 0x14a423850>,
    'score': 0.26240724325180054,
    'image': 'projects/yourprojectid/locations/us-west1/products/tan_strap_sandal_shoe/referenceImages/f970af65-c51e-42e8-873c-d18080f00430'}],
  'boundingBox': [x: 0.6475263833999634
  y: 0.8726409077644348
  , x: 0.7815263271331787
  y: 0.8726409077644348
  , x: 0.7815263271331787
  y: 0.9934644103050232
  , x: 0.6475263833999634
  y: 0.9934644103050232
  ]},
 {'score': 0.8066604733467102,
  'label': 'Shorts',
  'matches': [{'product': <pyvisionproductsearch.ProductSearch.ProductSearch.Product at 0x106a4fa60>,
    'score': 0.27552375197410583,
    'image': 'projects/yourprojectid/locations/us-west1/products/white_sneaker_shoe_*/referenceImages/a109b530-56ff-42bc-ac73-d60578b7f363'},
   {'product': <pyvisionproductsearch.ProductSearch.ProductSearch.Product at 0x106a4f400>,
    'score': 0.2667400538921356,
    'image': 'projects/yourprojectid/locations/us-west1/products/grey_vneck_tee_top_*/referenceImages/cc6f873c-328e-481a-86fb-a2116614ce80'},
   {'product': <pyvisionproductsearch.ProductSearch.ProductSearch.Product at 0x106a4f8e0>,
    'score': 0.2606571912765503,
    'image': 'projects/yourprojectid/locations/us-west1/products/high_rise_white_jeans_pants_*/referenceImages/360b26d8-a844-4a83-bf97-ef80f2243fdb'},
   {'product': <pyvisionproductsearch.ProductSearch.ProductSearch.Product at 0x106a4fb80>],
  'boundingBox': [x: 0.4181176424026489
  y: 0.40305882692337036
  , x: 0.6837647557258606
  y: 0.40305882692337036
  , x: 0.6837647557258606
  y: 0.64000004529953
  , x: 0.4181176424026489
  y: 0.64000004529953
  ]}]
  '''
The response contains lots of data, including which items were recognized in a the source photo (i.e. "skirt", "top") and what items in your project set matched with them. The API also returns a "score" field for each match which tells you how confident the the API is that an item in your product set matched the picture.
From Matching Items to Matching Outfits
The Product Search API looks at an inspiration picture (in this case, Laura's fashion pics) and finds similar items in my wardrobe. But what I really want to do is put together whole outfits, which consist of a single top, a single pair of pants, a single set of shoes, etc. Sometimes the Product Search API doesn't return a logical outfit. For example, if Laura is wearing a long shirt that looks like it could almost be a dress, the API might return both a similar shirt and dress in my wardrobe. To get around that, I had to write my own outfit logic algorithm to build an outfit from the Search API results:
# This code snippet lets you avoid pairing items that don't
# make sense together in an outfit (i.e. a top AND a dress
def canAddItem(existingArray, newType):
    bottoms = {"pants", "skirt", "shorts", "dress"}
    newType = newType.lower()
    if newType in existingArray:
        return False
    if newType == "shoe":
        return True
    if newType in bottoms and len(bottoms.intersection(existingArray)):
        return False
    if newType == "top" and "dress" in existingArray:
        return False
    return True
Scoring Outfits
Naturally, I couldn't recreate every one of Laura's outfits using only items in my limited wardrobe. So I decided my approach would be to look at the outfits I could most accurately recreate (using the confidence scores returned by the Product Search API) and create a "score" to sort the recommended outfits.
Figuring out how to "score" an outfit is a creative problem that has no single answer! Here are a couple of score functions I wrote. They give outfits containing items that have high confidence matches more gravitas, and give a bonus to outfits that matched more items in my closet:
# Option 1: sum up the confidence scores for each closet item matched to the inspo photo
def scoreOutfit1(matches):
    if not matches:
        return 0
    return sum([match['score'] for match in matches]) / len(matches)

# Option 2: Sum up the confidence scores only of items that matched with the inspo photo
# with confidence > 0.3. Also, because shoes will match most images _twice_
# (because people have two feet), only count the shoe confidence score once
def scoreOutfit2(matches):
    if not len(matches):
        return 0

    noShoeSum = sum([x['score'] for x in matches if (x['score'] > 0.3 and not isTypeMatch("shoe", x["label"]))])
    shoeScore = 0
    try:
        shoeScore = max([x['score'] for x in matches if isTypeMatch("shoe", x["label"])])
    except:
        pass
    return noShoeSum + shoeScore * 0.5 # half the weight for shoes
If you want to see all this code together working in action, check out this Jupyter notebook.
Putting It All Together
Once I had written all the logic for making outfits in a Python script, I ran the script and wrote all the results to Firestore. Firestore is a serverless database that's designed to be used easily in apps, so once I had all my outfit matches written there, it was easy to write a frontend around it that made everything look pretty. I decided to build a React web app, but you could just easily display this data in a Flutter or iOS or Android app!
And that's pretty much it! Take that, expensive stylist.