Improving Machine Translation with the Google Translation API Advanced
What’s Google’s new Translation API Advanced (v3), and how can you use it to improve machine translations?
If you’ve ever typed “how do you say X in language Y” into Google search, you’ve probably come across Google Translate — a feature that lets you translate text, PDF documents, or speech between languages:

The Cloud Translation API is Google’s API equivalent that lets you build translation into your app. This is super useful if you want to, say, make your app automatically usable across the world in many languages. You can call the Translate API through a REST endpoint or connect to it through libraries in Python, Javascript, Java, Go, and more.
For many applications, the API is a great quick’n’dirty way to get localization, especially for general user-generated content (think automatic translations of blog posts, Tweets, and comments). But it’s harder for general-purpose machine learning models to do a good job of translating very domain-specific language — technical documents, legal contracts, medical journals, etc.
This week, Google launched a new version of its Cloud Translation API with new tools to help developers better fine-tune their translations, especially for domain-specific applications. The update splits the API into two “editions.” The first — Translation API Basic (v2) — essentially does what the old API did. It translates text into 100+ languages and includes support for translating HTML and automatic language detection. Meanwhile, the newer edition — the Translation API Advanced (v3) — introduces a handful of new features, including batch translations (for processing large document sets stored in the cloud), translations with glossaries, and even making predictions with your own custom-trained machine learning models using AutoML Translation.
In this post, I’ll show you how you can use the Translation API Advanced (v3) in Python to fine-tune translations and translate documents at scale.
Setting Up Your Environment
Enabling Authentication
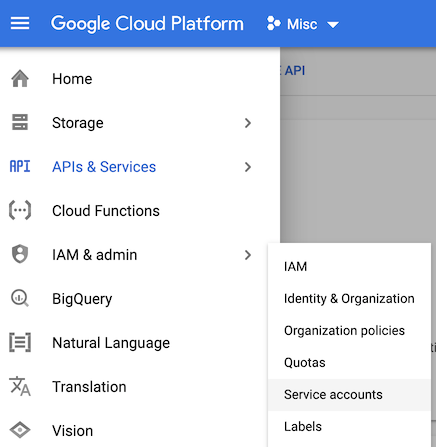
To get started, you’ll first need to create a new GCP project or enable the Translation API Advanced in an existing project.
Next, you’ll need to set up authentication. The Advanced edition requires you authenticate with a service account, which is a profile or identity that enables your app to authenticate.
You can name the account whatever you’d like. On the permissions page, assign the “Cloud Translation API Editor” role. Finally, on the last page of the service account creation flow, click “+ Create Key” and download a json key file. This json file contains all the information your app needs to authenticate, so keep it private (i.e. do not include it in frontend/client-facing code).
Environment Variables
In this post, we’ll call the API from Python. As is standard best practice when working with Python libraries, start by creating a virtual environment:
python3 -m venv venv
source venv/bin/activate
Next, install the translation library:
pip install google-cloud-translate
As mentioned earlier, the Translation client library uses a service account key to authenticate. It expects to find the path to that key in the environmental variableGOOGLE_APPLICATION_CREDENTIALS. Set that variable like so:
export GOOGLE_APPLICATION_CREDENTIALS="path/to/your_creds_file.json"
Translating Text
Before we get in to new features, let’s see how we can simply translate text from one language to another.
First, create a new Python file, i.e. translation.py. Up top, import the library:
from google.cloud import translate_v3
Next, you’ll need to create a new TranslationServiceClient and configure it with your GCP project id. Here’s what the code for translating text looks like:
Basic translation from English to Spanish. Note that the field “source_language_code” is optional, since the API can detect language of the input text.
Which prints:
Translated text: Probemos la API de traducción en Google Cloud Platform.
Note that the field source_language_code is optional, since the API can auto-detect source language. This means you can also use this library to identify the language of a piece of text, by inspecting the field response.translations[0].detected_language_code. Source and target languages are specified by their BCP 47 language codes, which are combinations of language and region codes (i.e. en-US, fr-CA, es-MX).
Translating with a Glossary
Above, we translated the sentence “Let’s try the Translation API on Google Cloud Platform” to Spanish. The result (“Translated text: Probemos la API de traducción en Google Cloud Platform.”) correctly captured that “Google Cloud Platform is a proper noun that shouldn’t be translated. But it translated “Translation API” to “API de traducción,” dropping the capitalization (the translation should have been “API de Traducción”). Alternatively, since this is the name of a specific GCP product, we might not have wanted to translate “Translation API” into Spanish at all.
In these cases, we’d like more control over how specific words (company names, product names, proper nouns, etc) are translated. That’s where the Translation API Advanced’s new glossary feature comes in. It allows you to upload a csv of word pairs that specify exactly how words should be translated. This is useful for specifying when words should not be translated or for choosing between alternative translations.
Writing a Translate Function with a Glossary
To use a glossary with the Translation V3 API, you’ll need to:
- Create a service account.
- Create a glossary file.
- Upload it to a Google Cloud Storage (gcs) bucket.
- Create a glossary resource using the Translation API.
- Make a
translateTextcall as before, specifying a glossary.
Let’s see how we can use a glossary file to prevent the product name “Translation API” from being translated to Spanish.
Updating Permissions
In order to use a glossary, you’ll need to give your service account a new role — Storage Object Admin — in addition to the Cloud Translation API User role. This will let your app access cloud storage, view files, create files, and delete them.
Create a Glossary File
You can create a glossary in many different formats, but the easiest way is to just create a “Unidirectional Glossary” using a simple csv. Make a file called glossary.csv and fill it with translation pairs, like so:
Translation API,Translation API
account,cuenta
directions,indicaciones
This glossary file specifies how the words “account” and “directions” should be translated, and indicates that the word “Translation API” shouldn’t be translated at all.
Upload Your Glossary to a GCS Bucket
Next, you’ll need to upload your glossary file to a GCS bucket. I’ll store the name of my storage bucket in an environmental variable, like so:
export GLOSSARY_BUCKET="gs://your_bucket_name"
Next, create a new bucket (or use an existing one) either in Python or from the command line using gsutil:
gsutil makebucket $GLOSSARY_BUCKET  # create bucket
gsutil cp ./glossary.csv $GLOSSARY_BUCKET # uploads file
Creating a Glossary
After you’ve uploaded your csv, file to the cloud, you’ll need to register a new glossary, like this:
Above, we created a new glossary with the id “my_first_glossary.” This unique identifier can be whatever you like, and you’ll use it to access this glossary later.
The call translate.types.Glossary.LanguageCodePair indicates that we’re using a unidirectional glossary designed to be used in translations from source_language_code to target_language_code (in our case, from English to Spanish).
Notice that we also specified a location where our glossary resource will be created which, in this example, is us-central1. For now, location must always be set to us-central1.
Now you’ve created your first glossary. Congrats! 🎊 Let’s see how we can use it to make better translations.
Translating with Glossary
Now that you’ve created a glossary resource, you can call the translate_text method just as we did before, but including a reference to your glossary id:
Translating with a glossary
This call is identical to translate_text we called before without a glossary, with three differences:
- You must specify a
glossary_config - You must specify
source_langauge_code(this field is not optional with glossary) - You must set location to be
us-central1
Building a Custom Model with AutoML Translate
Using a glossary with word pairs is an easy way to quickly up your translation quality. But sometimes, you may not have a glossary or know exactly which words’ translations you care about controlling. Or, you may find that the general wording of your translations— not any word or phrase in particular — sounds awkward.
For this, you can train your own custom machine learning translation model using a tool called AutoML Translation. This tool makes sense if you’ve already got a collection of high-quality, translated documents that you can use to train a new model.
For example, within Google Cloud, we wanted to see if we could train a model to translate our developer docs. This is a difficult task, even for a human, because software developer speak is rather jargon-y unless you’re a developer yourself. Luckily, a large chunk of our documentation had already been translated by humans. We used this data to train our own AutoML model. Let’s see how.
Training a Custom AutoML Model
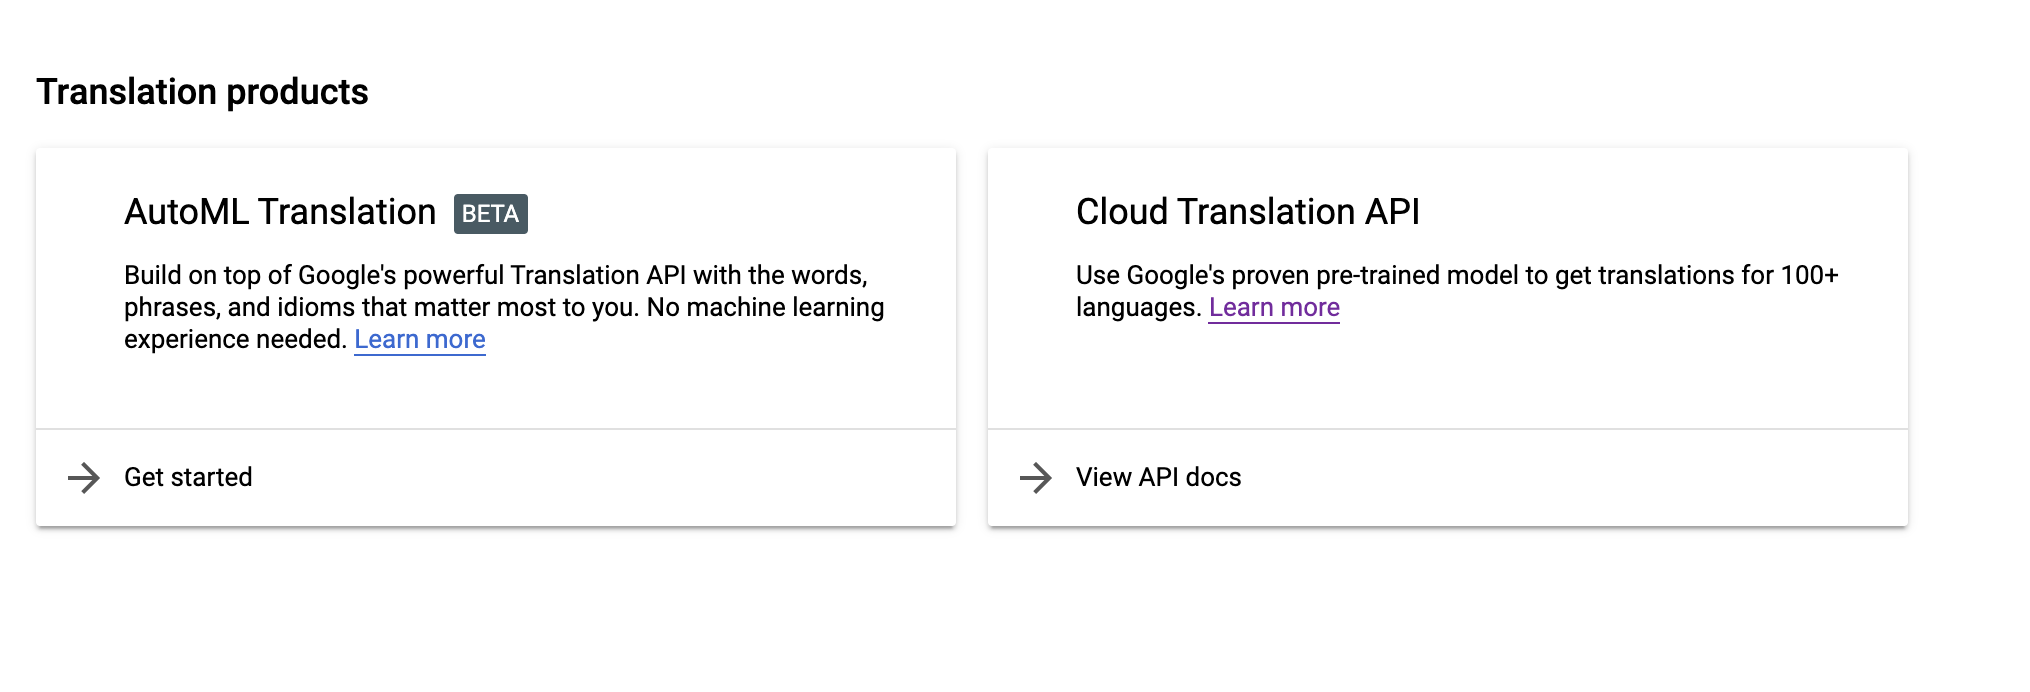
First, on the GCP console page, click into the “Translation” tool under “Artificial Intelligence”:
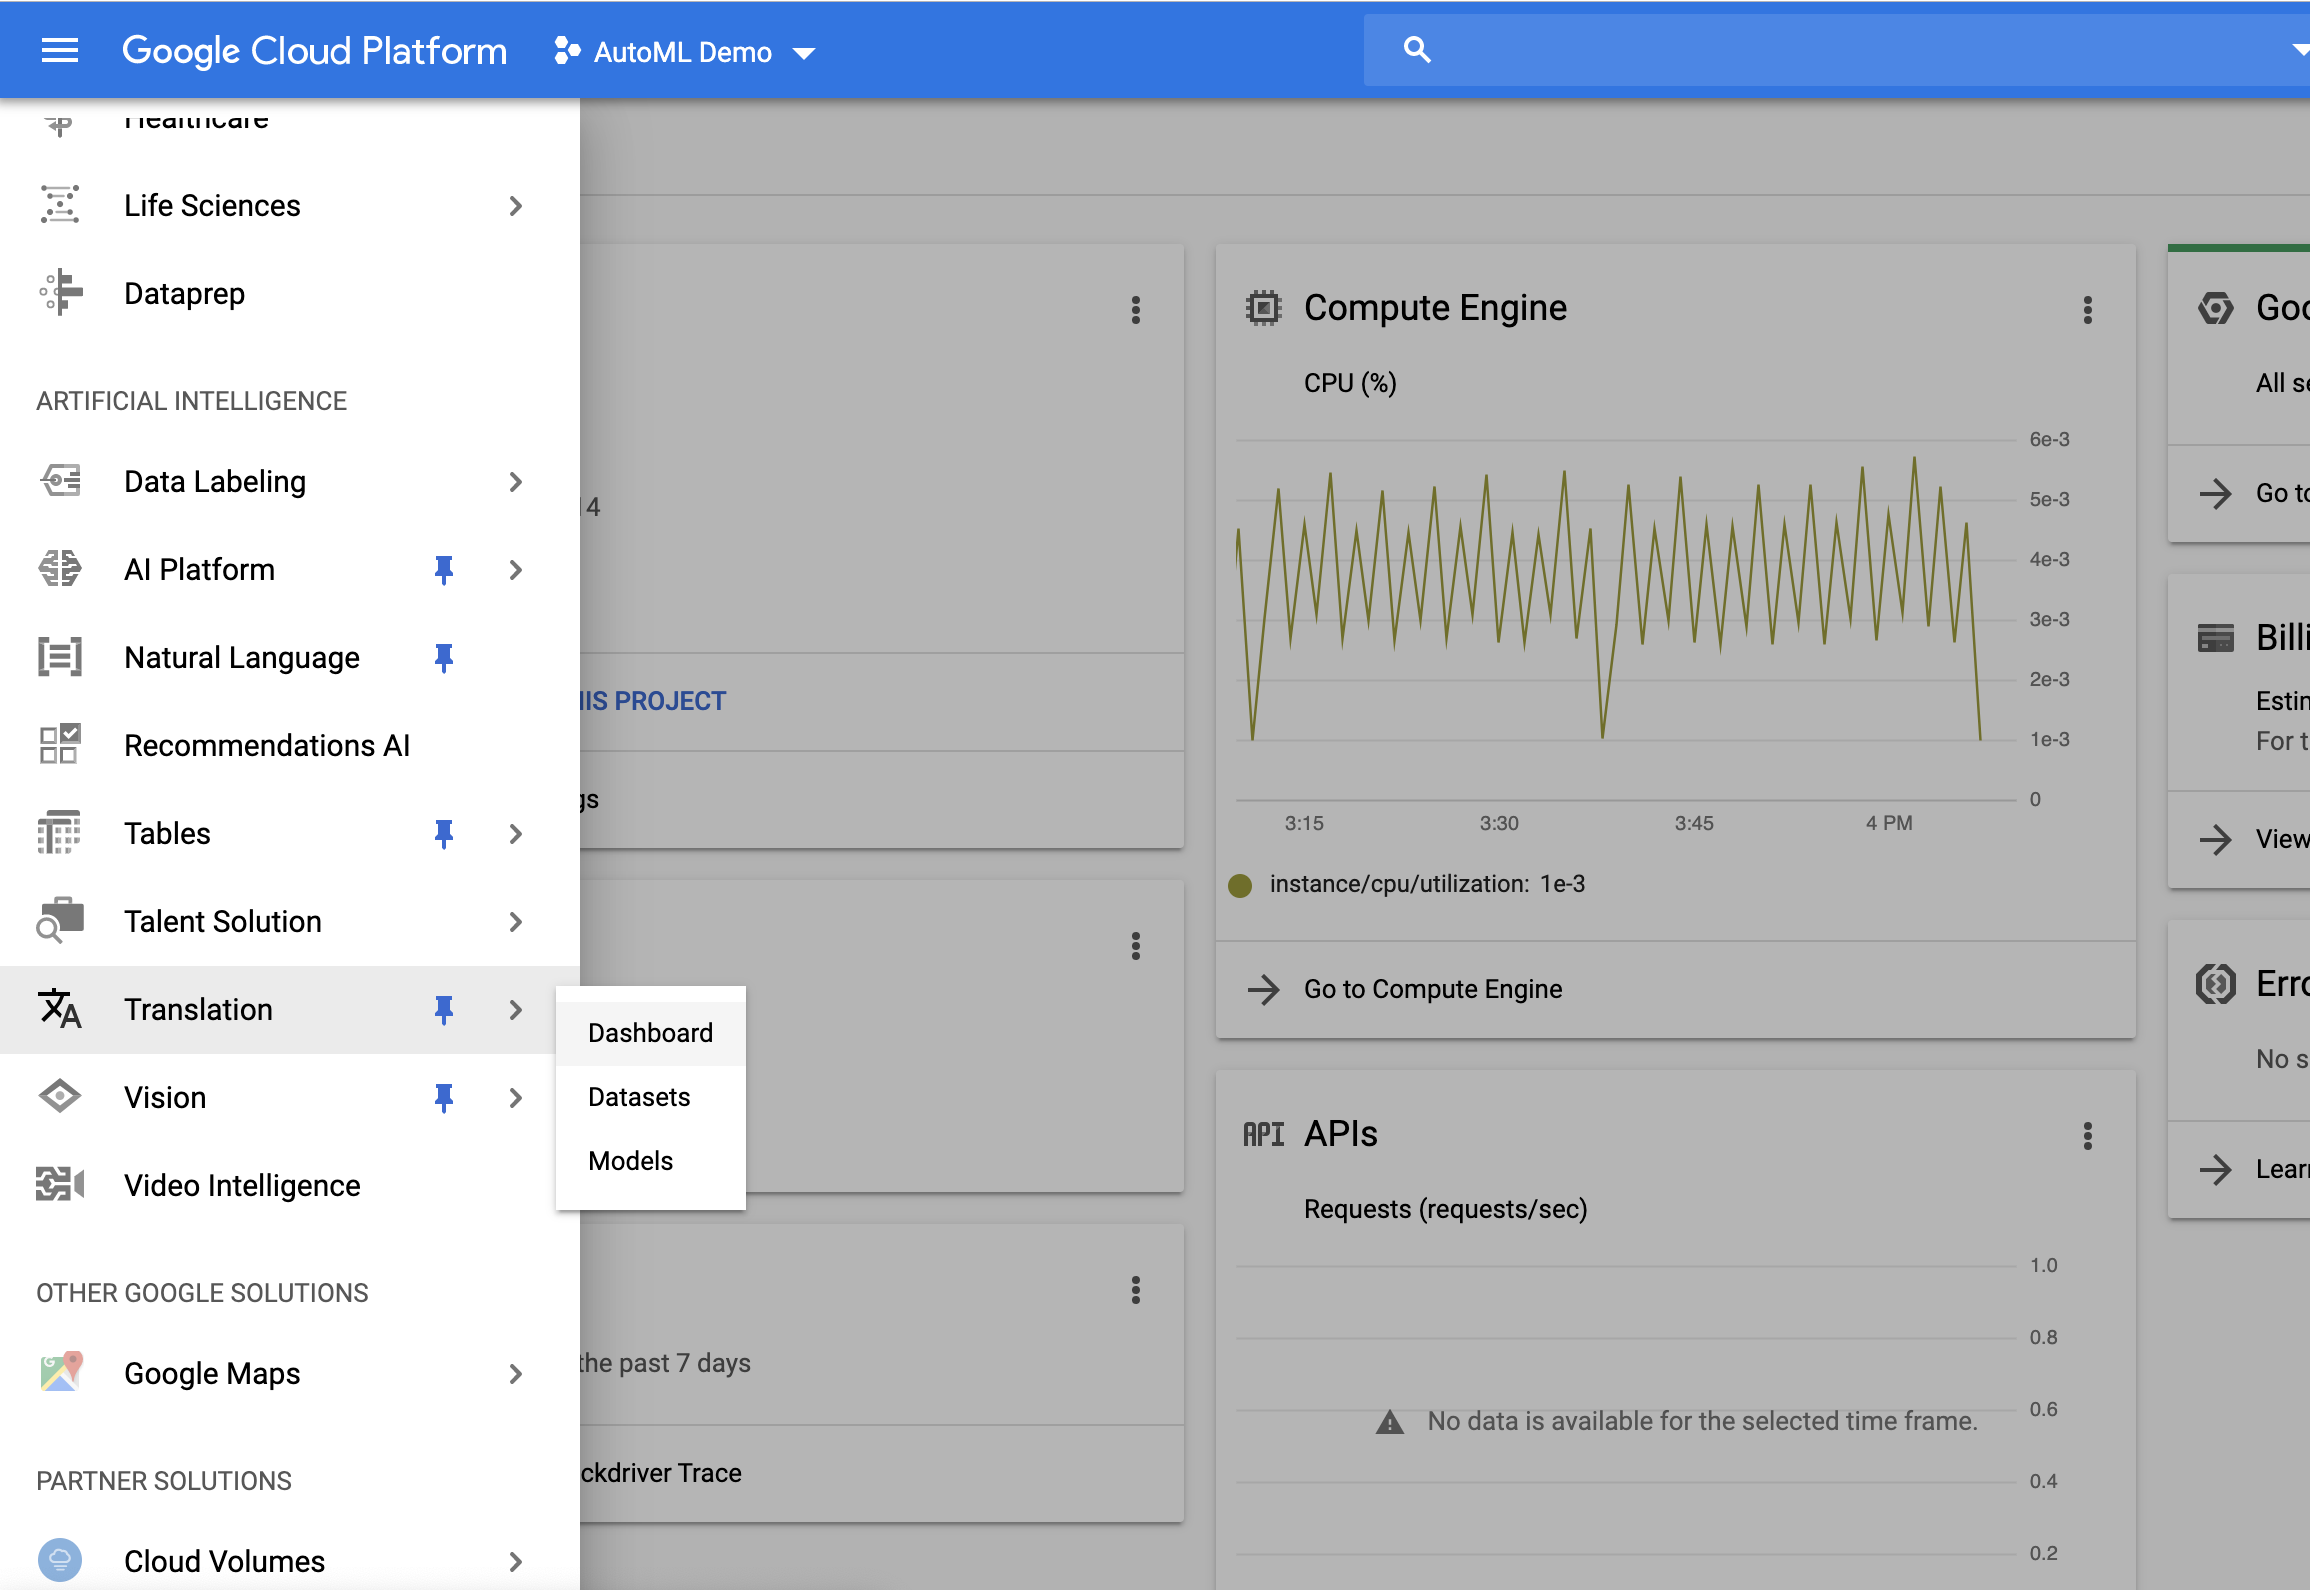
Here, you’ll be given the option to use the Translation API or AutoML Translation. Under “AutoML Translation,” click “Get started.”
Next, click “Create New Dataset” to upload your training data, specifying your source and target languages. You can import data stored in a cloud bucket or upload a csv fro your computer.
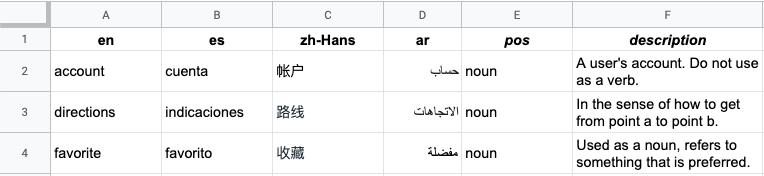
Here’s what my GCP documentation data, translating from Japanese to English, looked like:
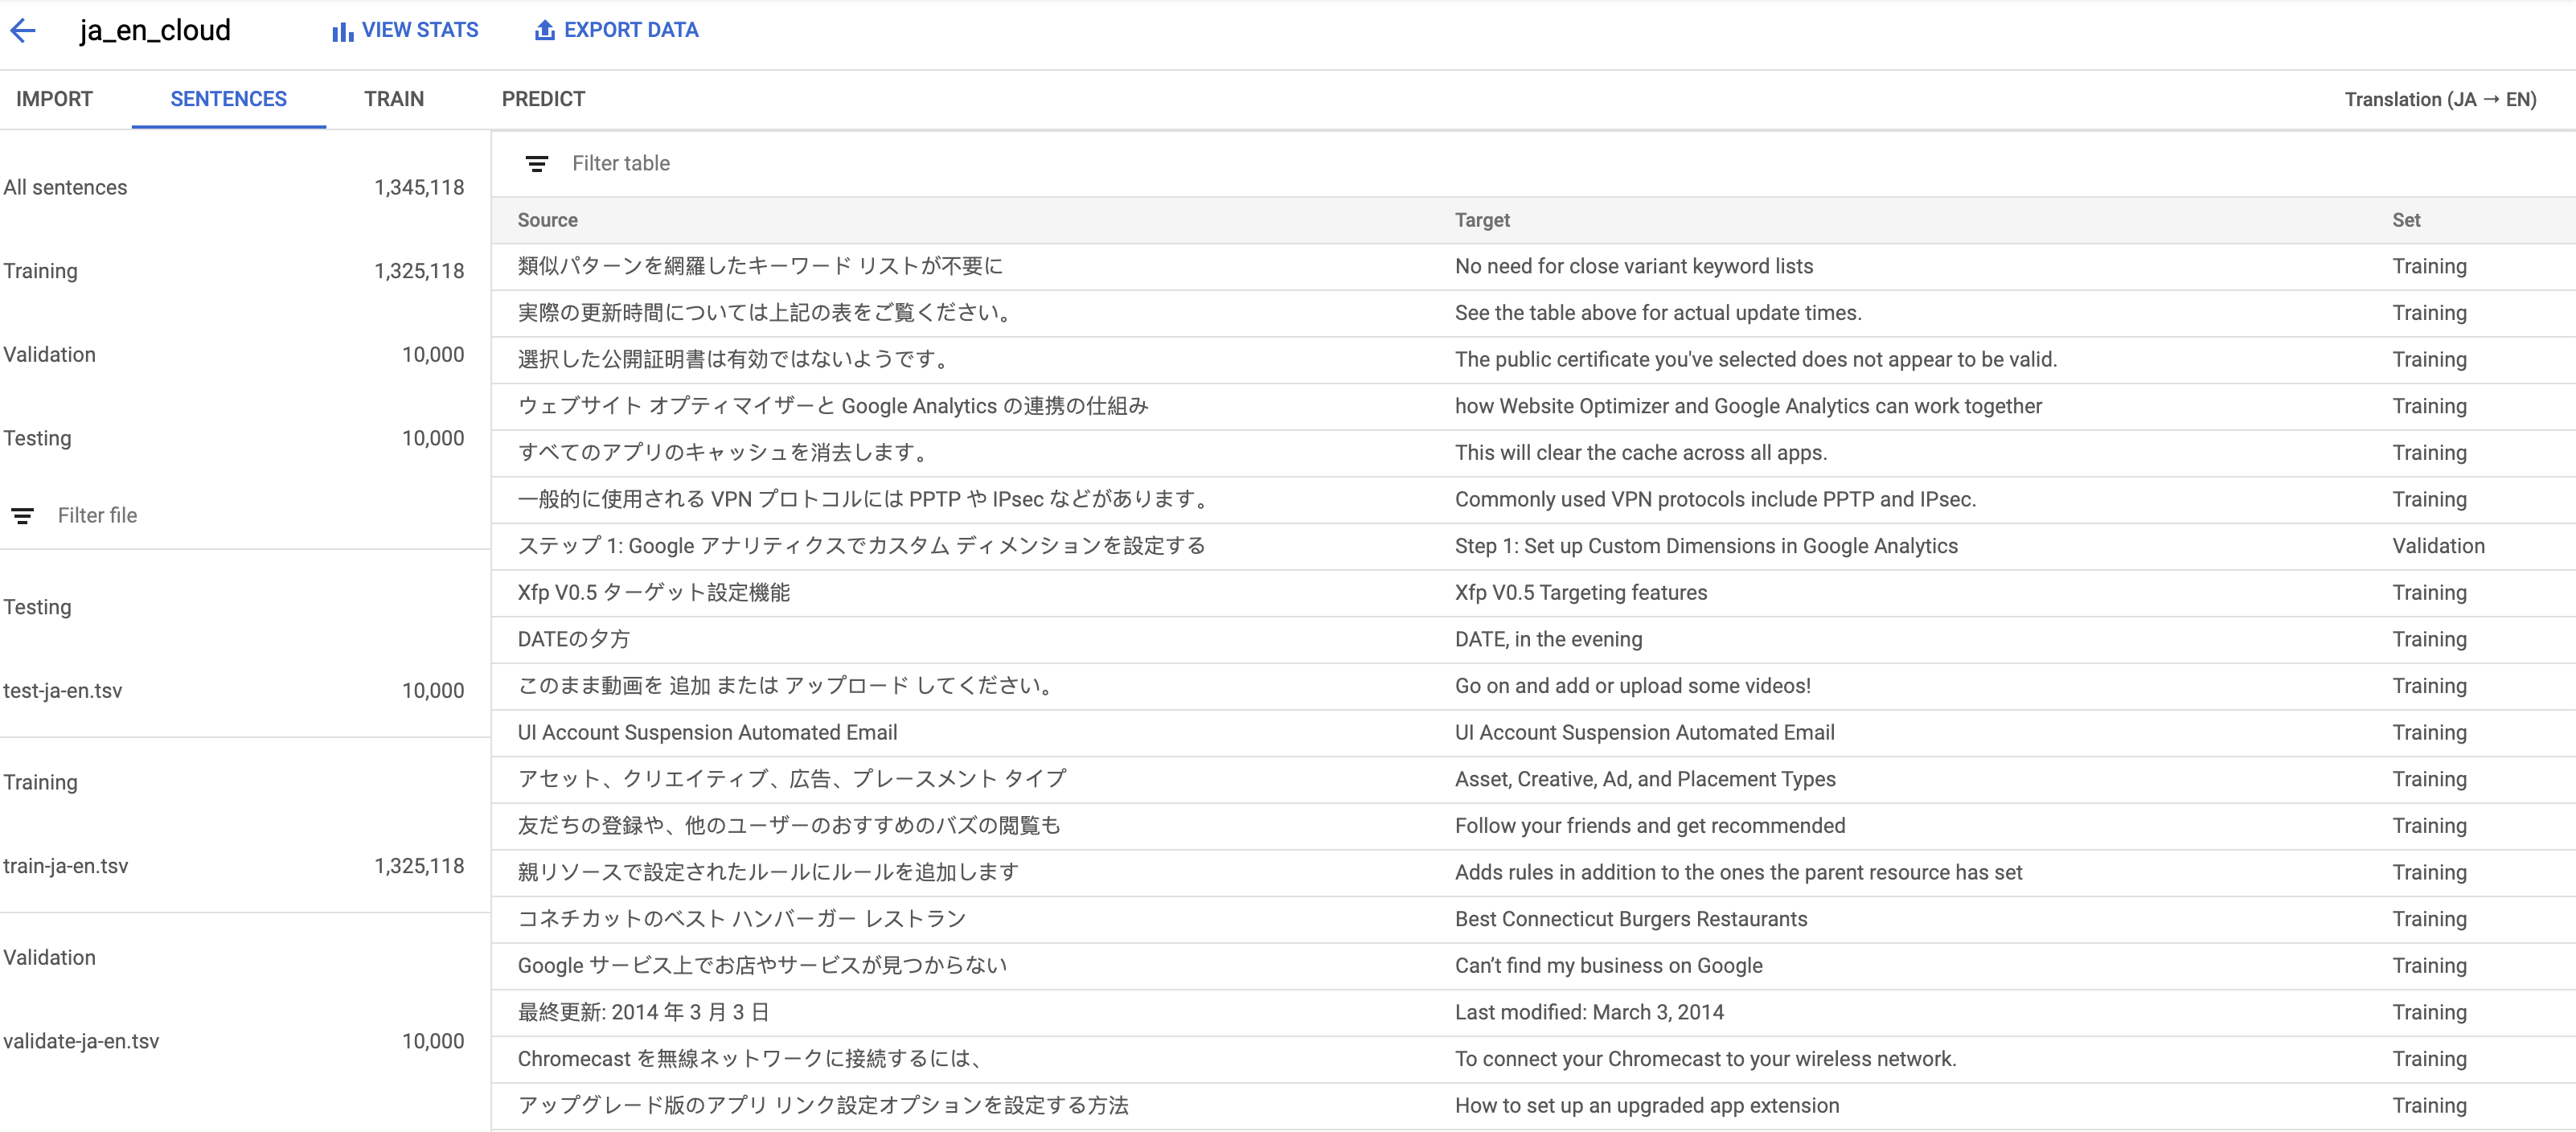
Luckily, because we’ve been using human translators to translate documentation for a while, we had over a million sentence pairs to use for training.
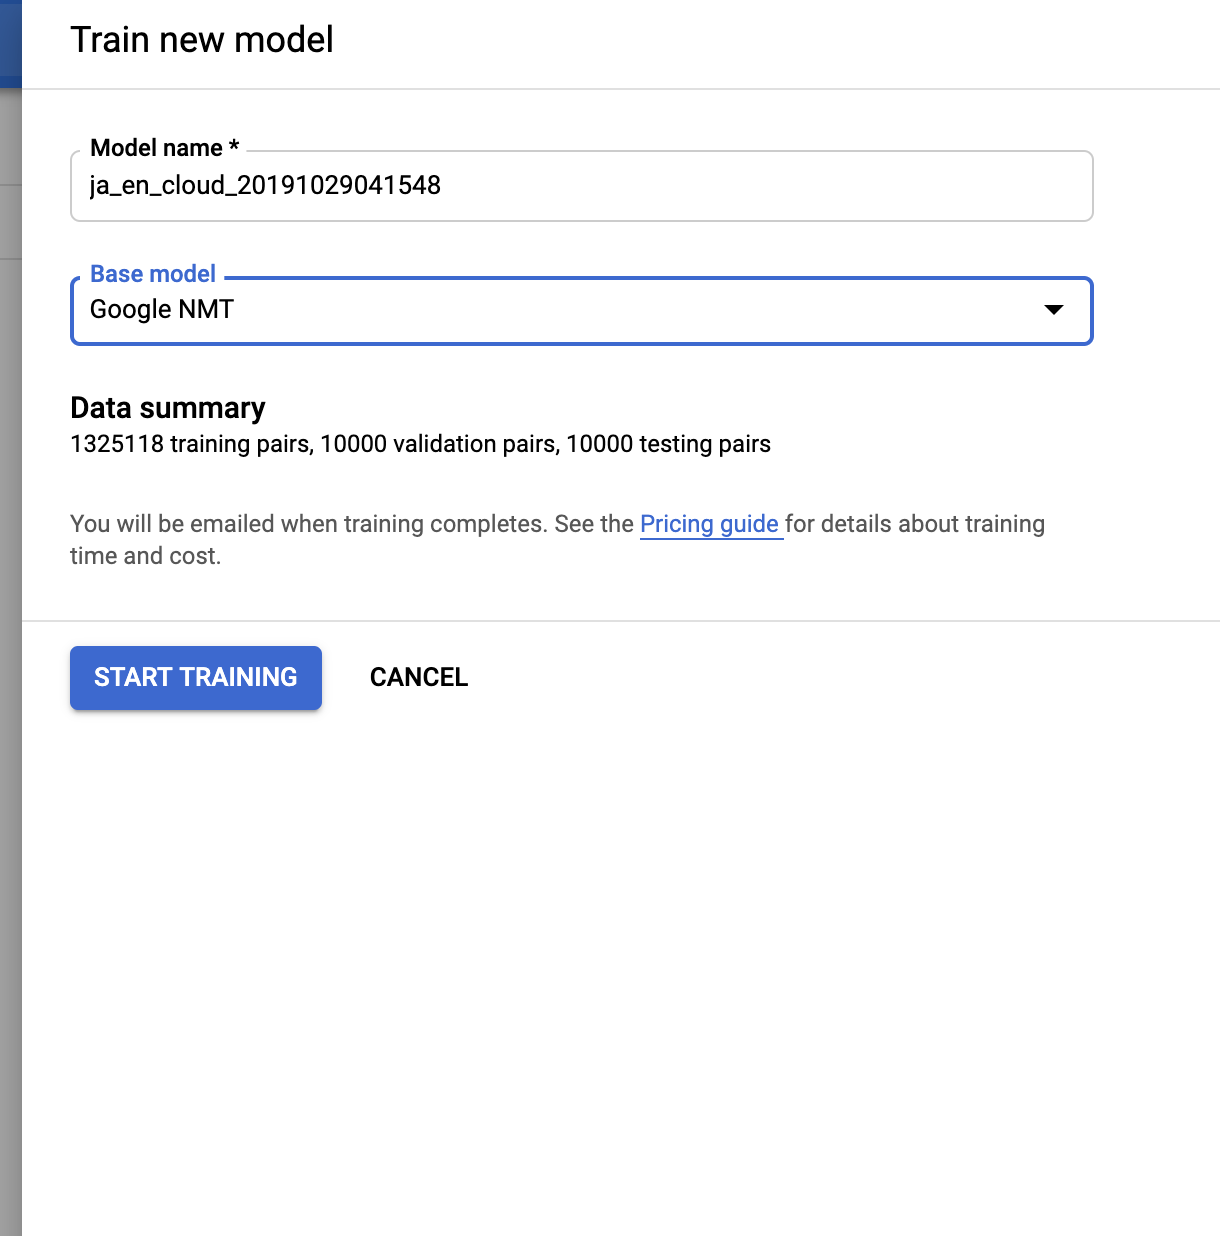
To train a model, click on the “Train” tab and click “Start Training.” You’ll be asked to choose a Base model, which by default is Google’s general-purpose model, “Google NMT.” After you start training models, they’ll appear in this drop down, so you can improve the performance of models you’ve already trained by adding new data. Click “Start Training,” and then take a break. This could take a while.
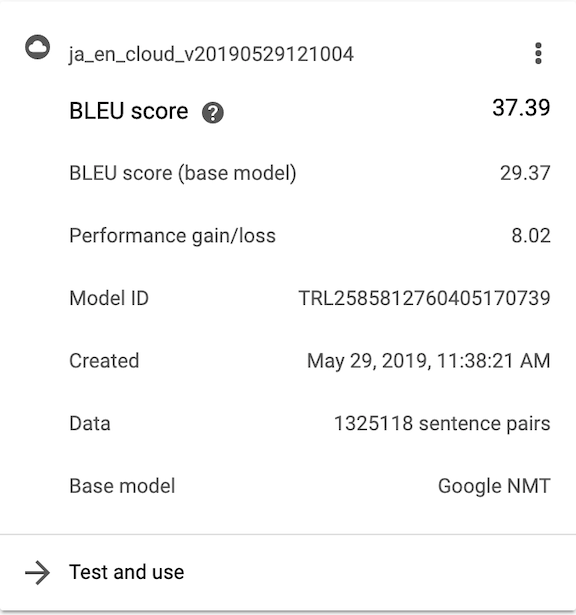
When your model is done training, you’ll get an email. Then you’ll be able to see your model’s performance back in the “Train” tab:
Evaluating Your Custom Model
How can we tell how well our custom model performed? One way is to compare the performance of the AutoML model to Google’s Base NMT model. We do this with a metric called BLEU (Bilingual Evaluation Understudy) score. There’s a great writeup explaining that metric here and a more in-depth one here. In short, BLEU score takes a ground truth translation and compares it to a machine translation. The more overlap between the human and machine output, the higher the BLEU score. Above, you can see the BLEU score for Google’s base model and your custom model as well as the difference between them, both evaluated on a holdout set of your data. In our case, we got a boost of 8.02 points from training a model ourselves.
Making Translations with an AutoML Model
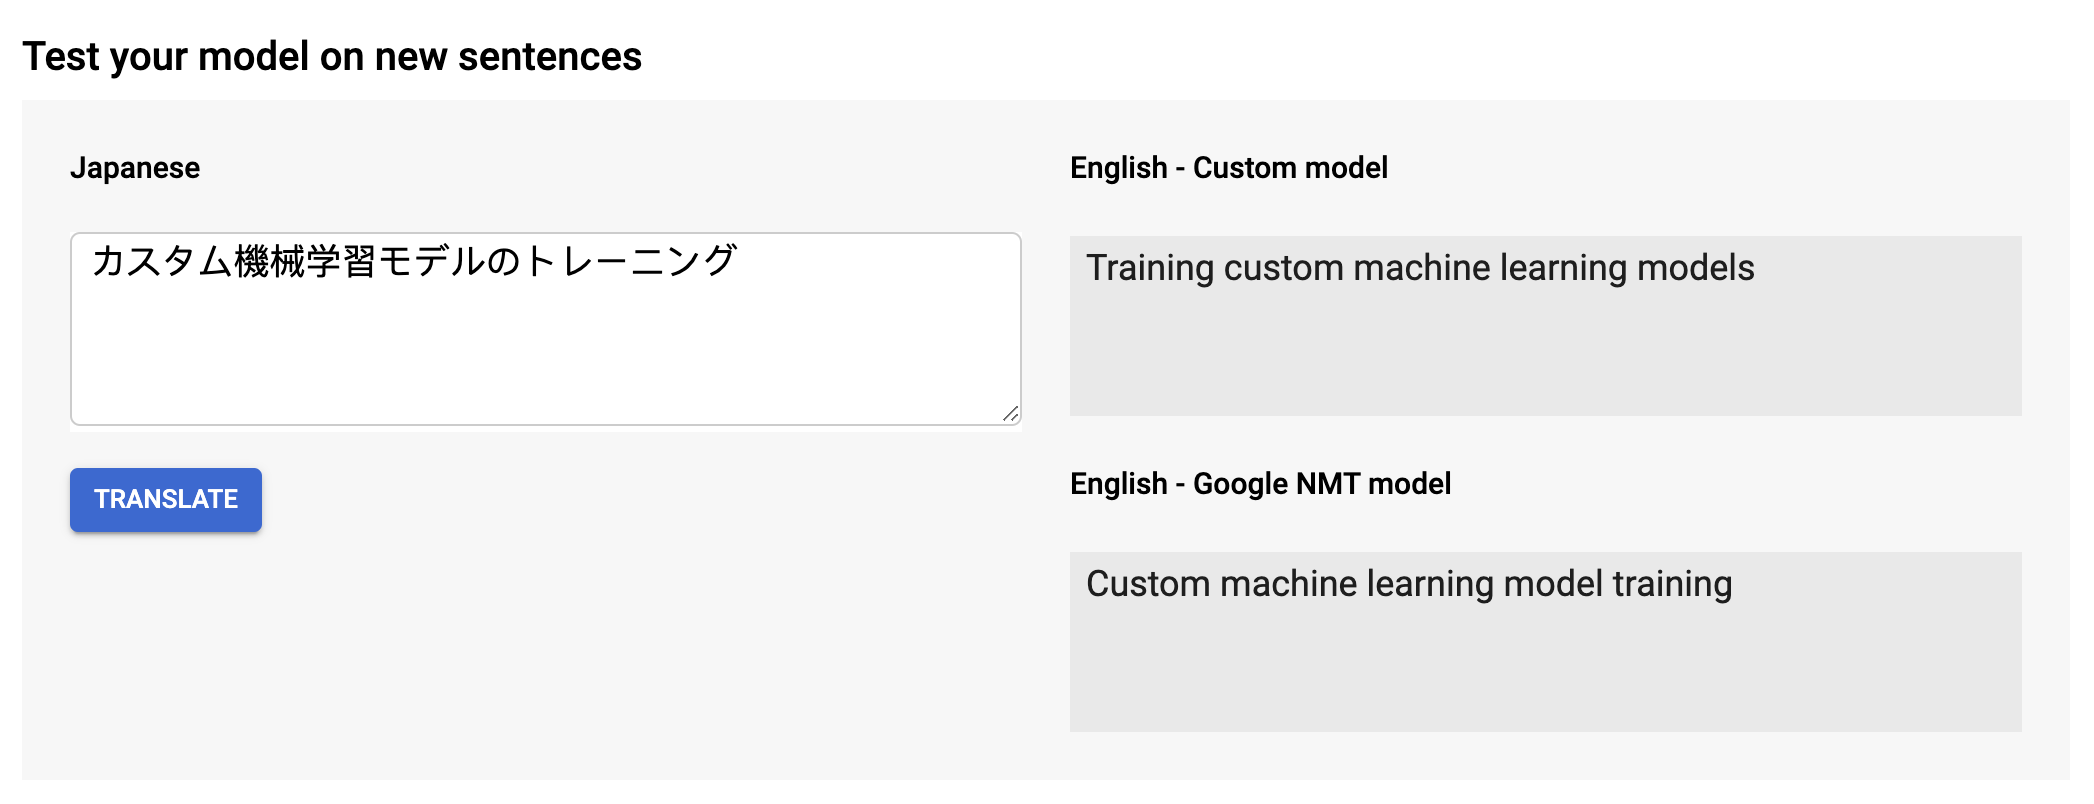
As a sanity check, you can hop to the “Predict” tab and translate sentences right from the AutoML UI:
Now let’s see how you can call your new custom model from within Python.
First, you’ll need to find the path to the model you just created. Conveniently, you can find this value in the UI under the “predict” tab (picture above), if you scroll down to the code samples. You’re looking for a field like:
projects/your_project_id/locations/us-central1/models/your_translation_model_path
Keep that path handy.
Now we can make predictions using our custom model almost the same way we did using the base model. We just need to add the optional parameter “model” to the translate_text call we made before, passing the path to our model:
Voila! You’ve translated text in Python using a custom AutoML Translation model.
Batch Translation
The final new feature in Translation API Advanced (V3) is the ability to translate batches of files. Instead of calling translate_text with a single string, you specify a set of documents stored in Google Cloud Storage. You also specify the destination path where you’d like the translations to appear:
Note that, although we wait for the result here, you can also call batch_translate_text asynchronously. This makes sense if you’re translating a huge amount of text and don’t want to wait around for the call to finish!
That, in a nutshell, is what’s new with Translation API Advanced. Meanwhile, if you’re already using the Translation API and don’t need any of these features, Translation Basic’s got you covered.
Good luck, and feliz traduciendo!